|
My first attempt of making a soup this season was successful, and yes you are in the right blog, and yes I will talk about tools.. just bear with me for a second.
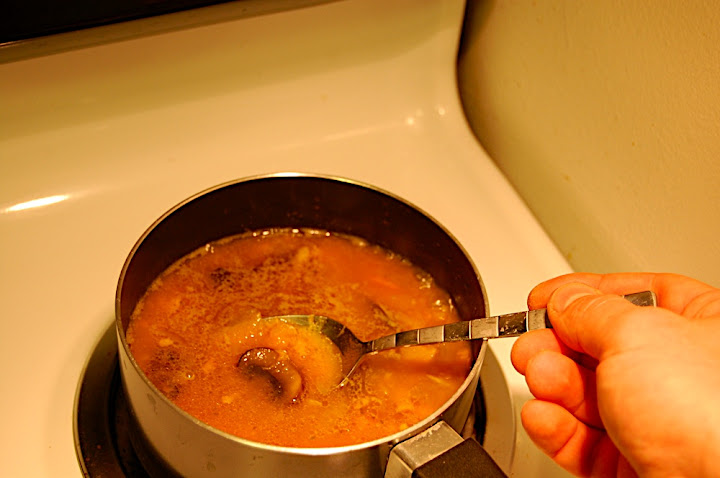
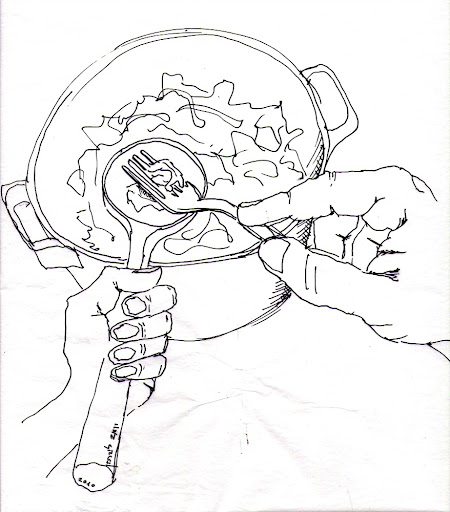
I made root vegetable soup, with onions, sweet potato, butternut squash, celery root, garlic and mushrooms. But since I am spending the semester away from home, in Purchase College NY, I do not have all my favorite kitchen tools with me. There is a limited amount of tools in the kitchen of my artist in residence apartment, and I could not find a potato masher nor a veggie peeler among them. I was giving this apartment, which is a really nice place, to allow me to live on campus and be close to the great wood shop they have here; and the woodshop is quite the opposite – It is full with splendid tools. In order to make soups I use the potato masher to crush and mash the vegetables, just before I add the water, and just after they became soft. And as you all know, not having the right tool for the job can be frustrating. I brought with me a good 9 1/2” long chef knife to cut and chop, and also a small 3” knife to stem vegetables and to peel. With the chef knife I chopped the onions and crushed/diced the garlic cloves (I don’t use a garlic crusher). Than I looked for a vegetable peeler. Since I couldn’t find a peeler I had to whittle away the butternut squash hard exterior and the celery root. If you think about it.. a veggie peeler is like a spokeshave, as it allow you to shave the peel, following its curvy surfaces without digging too much into the vegetable flesh. After peeling the veggies, I fried the onions added the garlic, the butternut squash and the sweet potato. I let them cook for 20 or 30 minutes and then I started thinking, how I am going to mash them? Should I use a fork, a regular spoon or perhaps my round maple spoon which I brought with me from Massachusetts? I was kind of confused, as non of these options looked very promising: Using metal tools to crush veggies inside a nonstick pan is bad, as you will probably scratch the nonstick coating, and plus you will have to stick your hand into the pot ... and it is hot there – very hot. But then came this bright idea: I will load the maple spoon with the veggies and use a fork to mash them against the wooden surfaces. Doing it in the pot, half way up from the boiling stew, will save both my skin and DuPont Teflon coating.
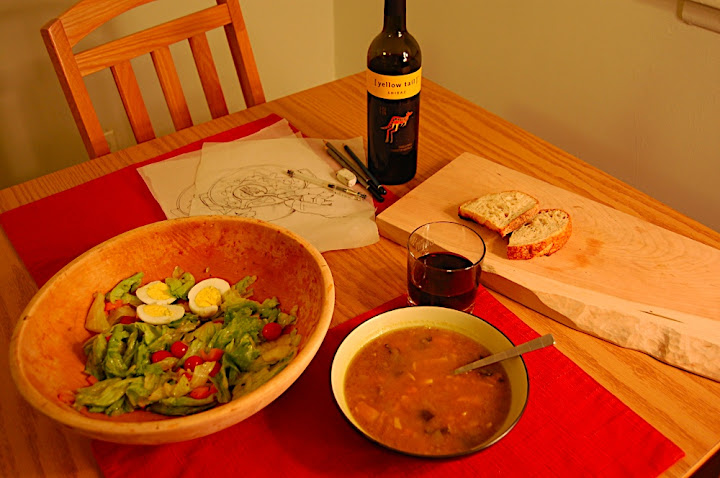
And this is exactly what I did and it was so successful that I decided to share it with you. After mashing the vegetables I added water, mushrooms, spices, salt and pepper. I then let the soup cook for 30 minutes and voila ... the soup was ready.
0 Comments
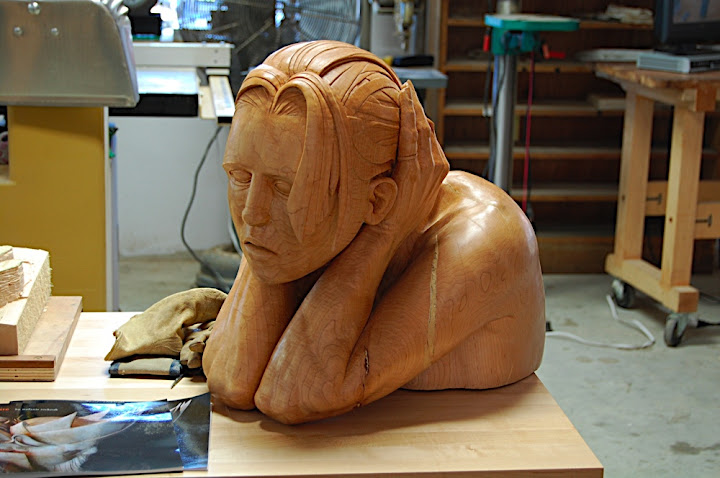
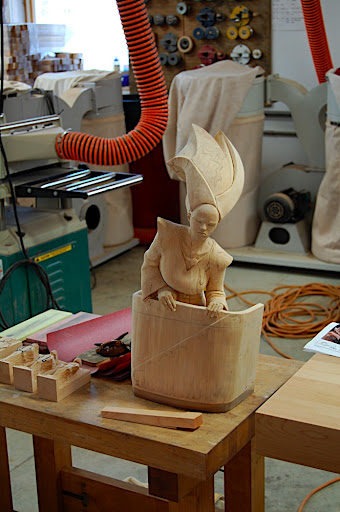
One of the remarkable artists who demonstrated her unique talent and skills at the open house, was Stefanie Rocknak. Steff is not just an amazing carver and sculpture, she is also a David Hume scholar, serving as a Professor of Philosophy at Hartwick College.
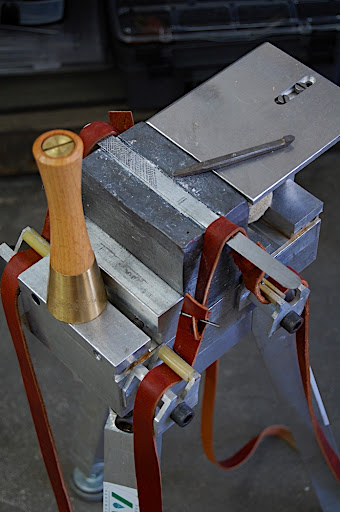
I met Michel Auriou the rasp maker form France, whose four people company makes the best hand made rasps in the world. He brought with him a tooling device which helps the worker to hold down the rasp’s blank while the teeth are formed – one by one... http://www.forge-de-saint-juery.com/
I had a very interesting conversation with Kevin Glen Drake, the maker of some of the most exquisite hand tools in the market, and the innovator of the Tite-Mark Marking Gauges. http://www.glen-drake.com/
I met Peter Follansbee a master carver form Plymouth plantation historic village in Massachusetts. Peter has a great blog about traditional woodworking.. from ... http://pfollansbee.wordpress.com/
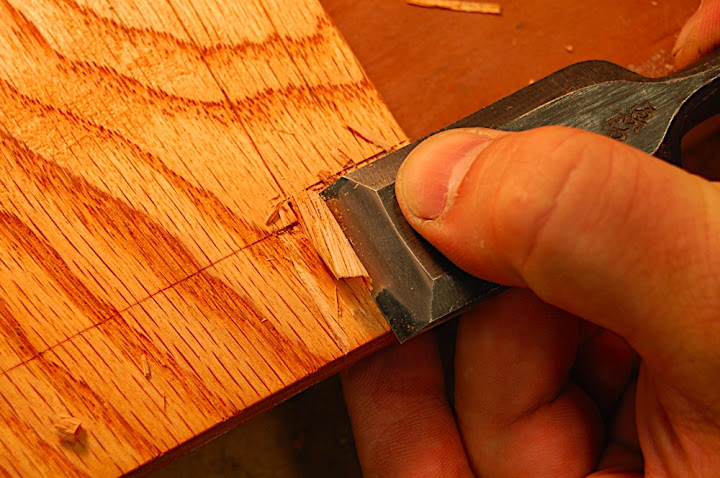
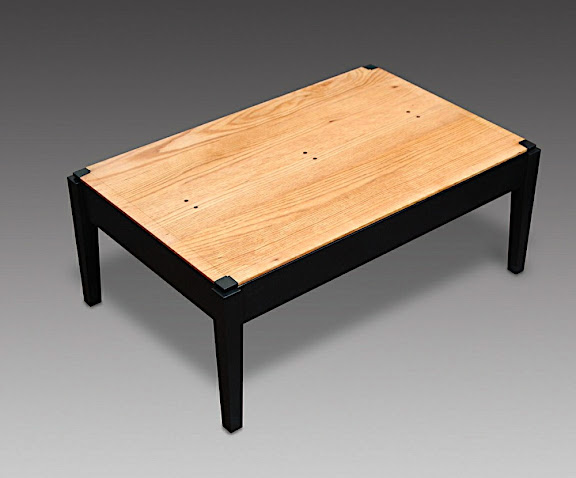
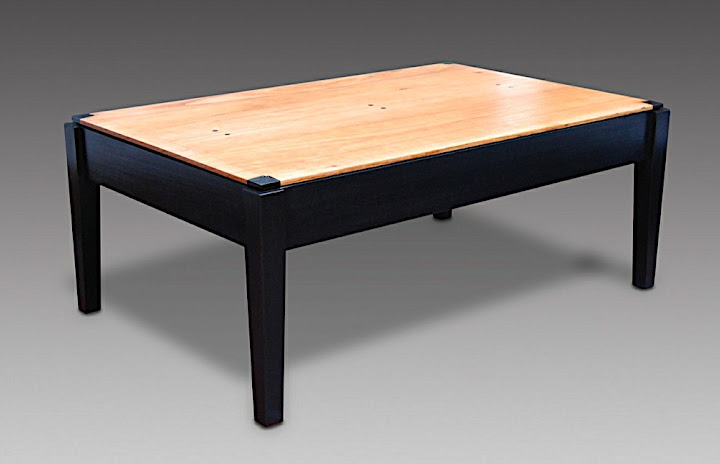
And I met many more interesting people form across the Nation and form Canada who came over to see, to smell, and to work wood. The last part in the coffee table project, was to add a corner detail to emphasize – even farther – the presence of the slanted chamfer. I decided to create an indented square at each corner which will expose the chamfer's angle and thus will make it more conspicuous.
I used a chisel and made the indentation. I then painted the square black-gray (the same color as the table base. One might mistake the black-gray square as the top of the leg, but of course this is just an illusion.
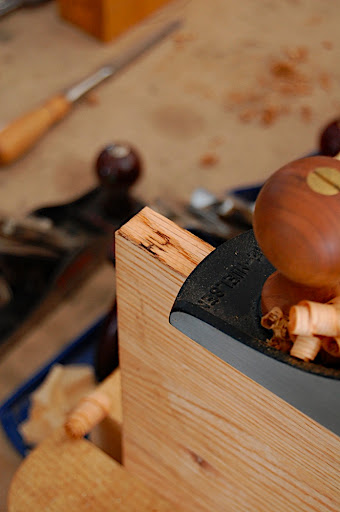
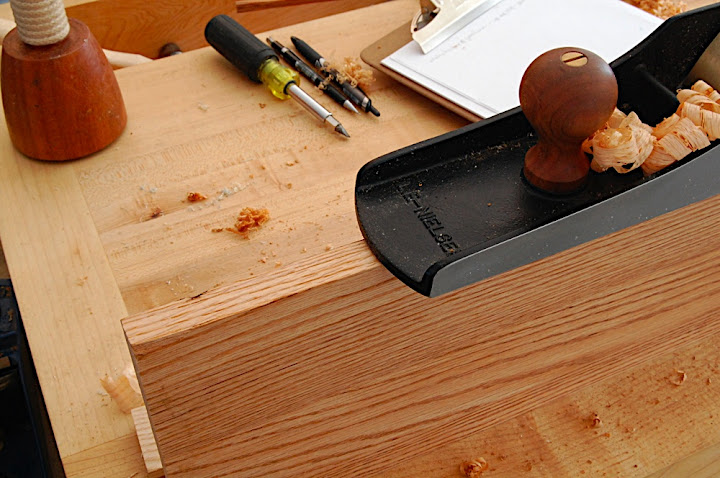
Lie Nielsen's Open House and the making of a table top – part 6: Dealing with eventualities9/19/2010 After the glue, which secure the dowels dried, I planed the dowel and its surrounding surfaces flush. Then I started to rabbet the boards edges to allow them to fit in into the table frame.
I did not want to connect the board to the frame with fasteners; it was not necessary, as I created an internal rabbet (or lip) on all the table apron/rails which will accept the rabbet on the table top.
But then alas...!
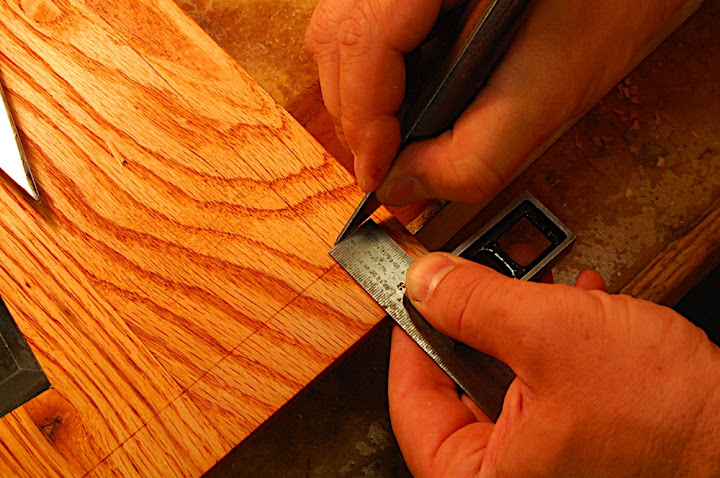
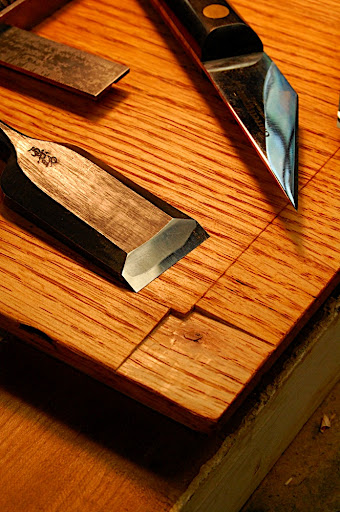
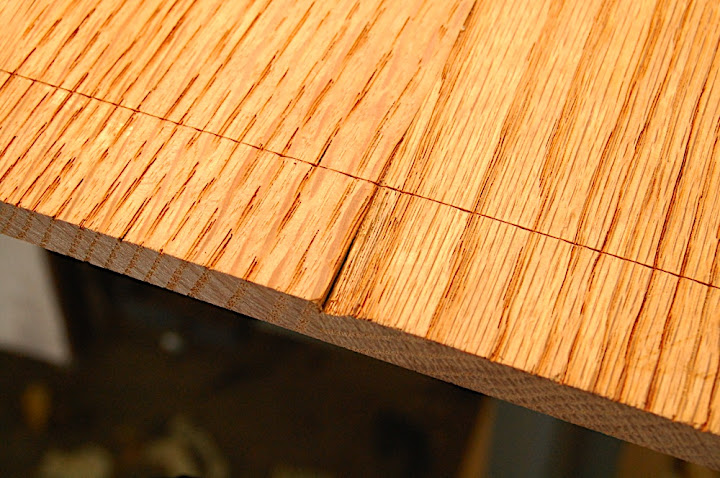
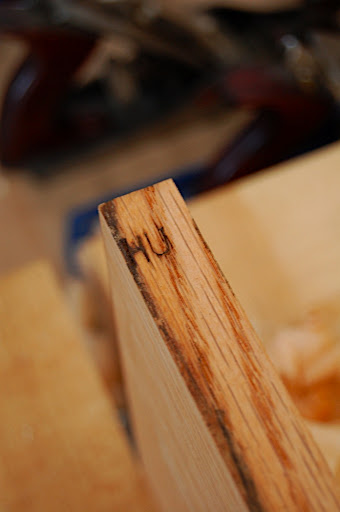
It was a pity but actually not such a bad one. As it happen often: mistakes and accidents can lead to discoveries. In this case, and instead of trying to embark on a restoration mission (fitting a replacement piece of oak and then planing it down) I decided to change the design a bit. I went on to create a slanted chamfer on all edges. I planed the chamfer until the missing wood chip blended in the angled strip. Before starting to plane the chamfer I scored its parameters. I did it for two reasons: to help me know when to stop planing; and to create a defined transition line between the chamfer and the table top.
You see, it would be very difficult to recognize a chamfer of such a subtle slanting angel – as an intended design feature – without the border line. When it is difficult to pinpoint a transition between structures or materials, people tend not to notice it.... or worth: think that the maker made a mistake or neglected to think the design through.
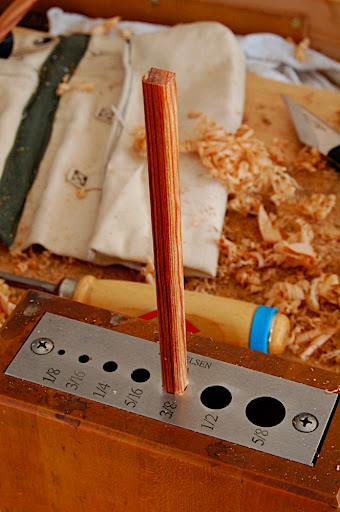
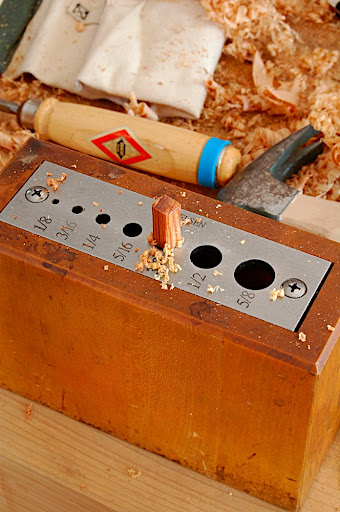
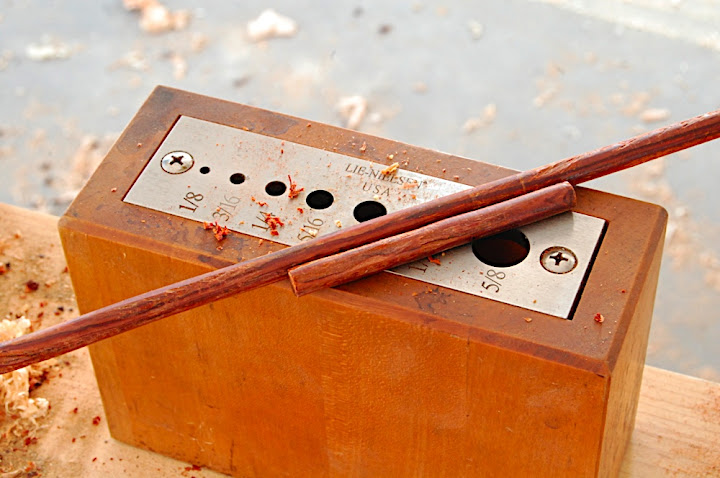
After making the keys and forming all the the mortises, I made the dowels. To make a dowel I first used the band saw to re-saw and form a square shape rod. Then I forced it into a hole in a dowel maker (dowel maker in a steel plate that has tapered holes in deferent dowel diameter.
I found out that some woods, like Bubinga or Heard pine, will not shave so nicely while others, such as birch or maple will be easier to form. However, I choose Bubinga for its beauty and contrasting effect on the oak.
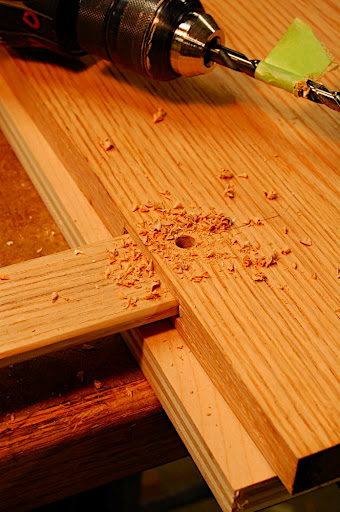
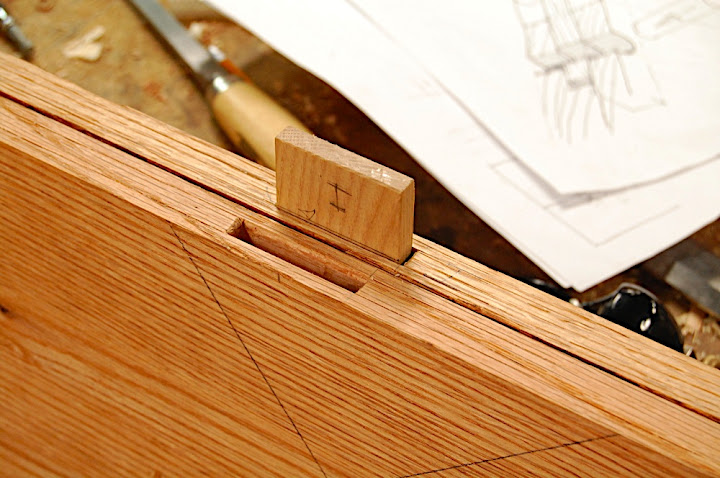
After the glue dried I drilled a hole that passed from one face of the board to the other, penetrating through the key. Than I inserted the dowel to secure the key – just in case, and for appearance purposes. Then came the crucial part of drilling and alighting the holes on the other side of the board, so that once the dowels are inserted the it will force the joint between the boards to close; enough to make the dowel to spring and pull the key inside the mortise and consequently the edges tighter.
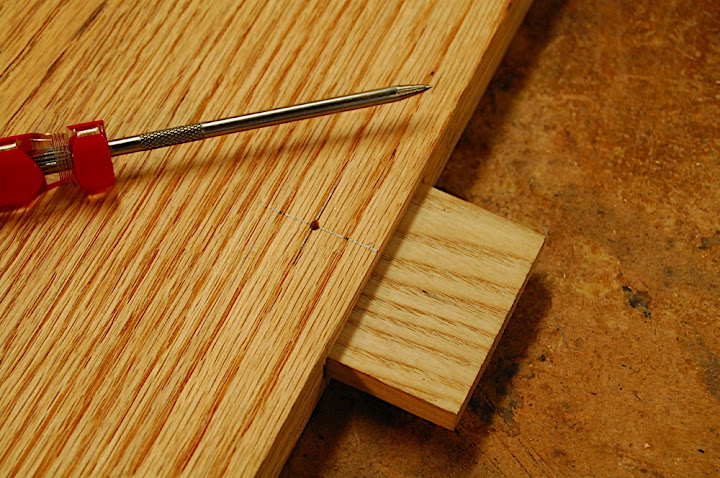
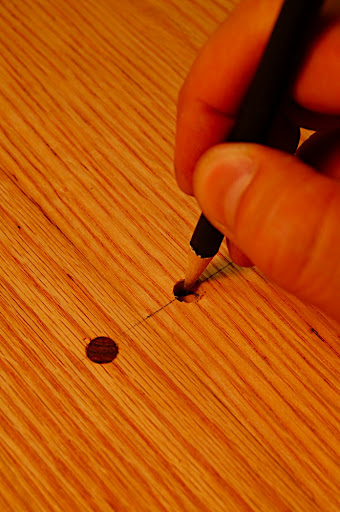
Than I inserted the facing boards and its keys to the mortises and marked out the circumference of the entry hole onto the key.
The next step was to indent an of-center point on the marked out circle. I drilled the of-center hole, brushed glue in the mortises, on the keys and on the edges and pressed the parts together. Then I drove the dowels in (with some glue) and saw how they pul the joint tight.
The most common and easy way to glue two boards together (in order to make a wider board) is to joint the edges, apply adhesive and clamp them under pressure until the adhesive cures. Occasionally we will add biscuits or a splines in between the edges; in other cases, when we need to make a superior joint with greater contact surfaces between the two edges, we will use a special router or shaper bit to make a series of grooves and complimentary ridges that will fit into the grooves.
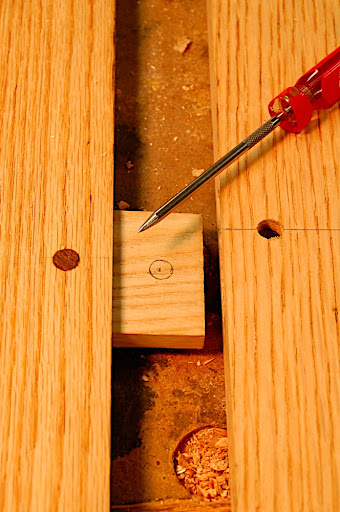
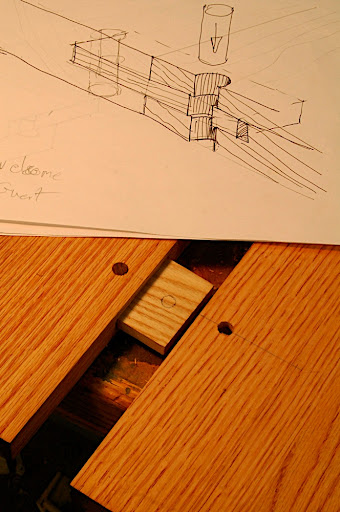
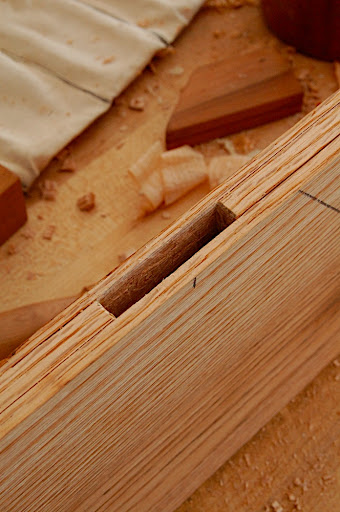
In the case of the table top I built, I choose a third technic. Few years ago I read a book on country furniture making, written and illustrated by George Buchanan: The Kitchen – Timeless Traditional Woodworking Projects. While reading this book I’v learned how to join boards without the assistance of clamps. A key is inserted into the edge of the two boards, than pegs are inserted into the boards to secure the keys. But the pegs have a much more important mission. As the holes in the keys and the boards are intentionally not in complete alignment, diving the peg into place will create a force to pull the two edges together (see illustration attached).
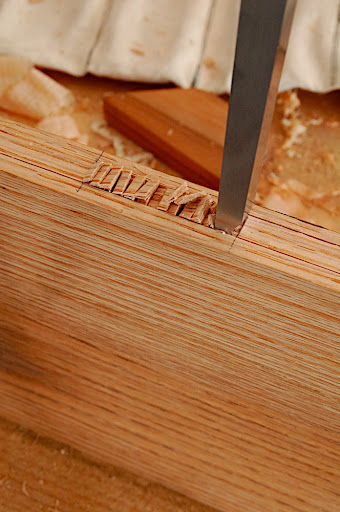
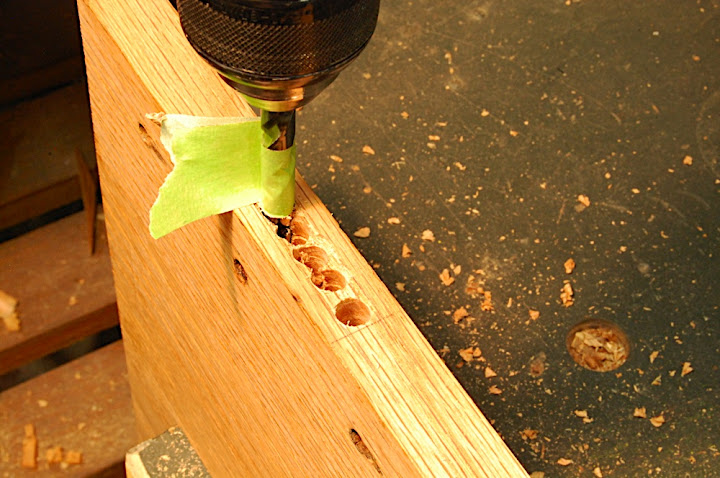
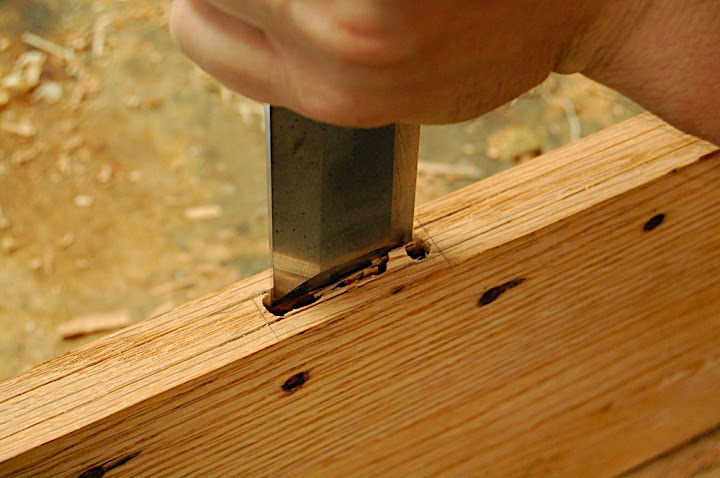
The hole in the key is off seted by a tiny amount – enough to make the peg spring and pull the key inside the mortise and consequently the edges tighter. I made the keys from ash. At Lie Nielsen’s open house event I used mortising chisels to crated the mortises. Later on in my studio, I finished the remaining mortises by combining together the force of a cordless drill, a mortise chisel (for the mortise narrow edge) and a bench chisel on the long edges.
Lie Nielsen's Open House and the making of a table top – part 3: Planing the table top's boards.8/29/2010 As you recall in my first posting about the Lie Nielsen's open house, I wrote that in order to make the new coffee tablet top, I used the remains of an old bookcase that I salvaged from the trash of Harvard college.
The bookcase had several parts which were dadoed-nailed together. To make the coffee table top I decided to used the book case’s sides. I chose the outer surfaces to be the top’s top. This was the obvious choice, as the inner faces – which included the holes for the shelves hangers – had to be placed face down. At first I did not know what kind of finish was applied on the boards. It looked dark brown and not in the best condition. I decided to take it off, and knew I could do it in few ways: Sanding, striping, or planing.
I don’t like sanding – who does, besides, if you plane after sanding you will most likely ruin the nice edge you work so hard to create.
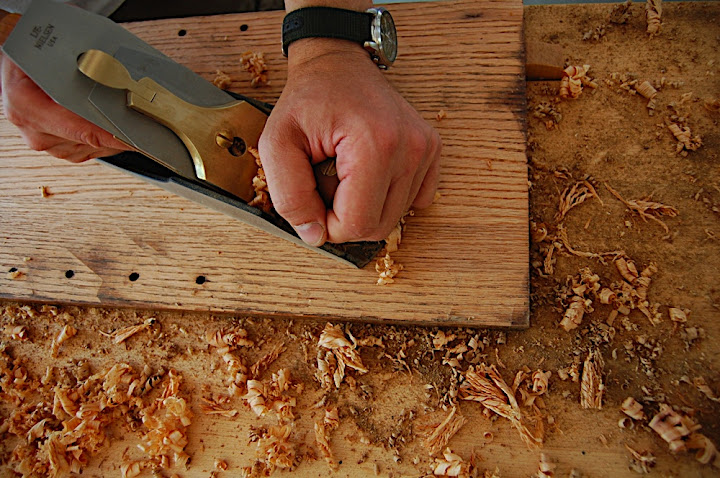
So the last option, and my most favorite one, is hand planing. When I started planing, I smelled a familiar scent. It was mixture of mold smell and shellac aroma.... and no, I am have not lost my mind... I used a No 4 1/2 plane and a low angle Jack plane with a toothed blade. At first everything worked fine. I encountered no tear-outs and managed to remove the finish and a thin layer of shaving with ease. But them things started to be comlicated. Parts of the finish stacked to the sole of the plane and practically lifted it off the surface to the extant the the blade could not engaged the wood.
I tried to remove the clogged up finish with a 3M scrub pad, but this was time consuming, and plus, I did not wanted to erode the sole of the plane.
Then came the eureka moment we all are very proud of when we remember it in retrospect! why to straggle with the finish with mechanical means when I know what shellac is most submissive to? you guess correctly (and you don’t have to pass Organic Chemistry 101): Alcohol, Methanol, Ethanol... as far as I know they all dissolve it fast and efficiently. And this is exactly what I did. I got some denatured alcohol and cleaned the plan’s sole every time shellac clogged it. After this, planing was quite easy and I finished stage one of the project in less then two hours (including one coffee brake and few chitchats with my fellow artist and other guests).
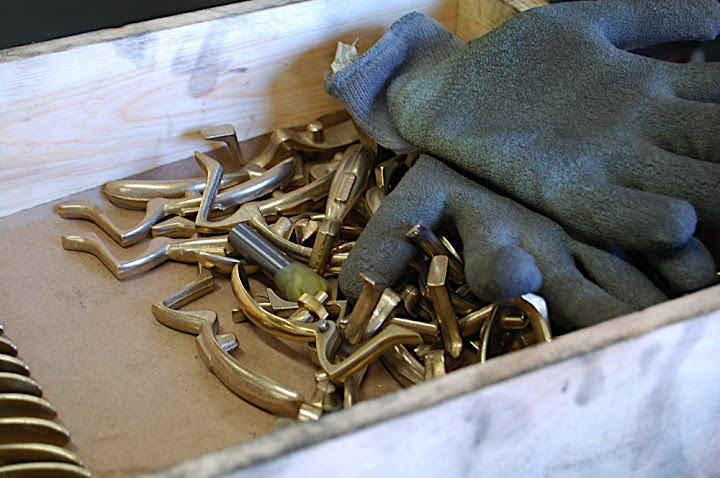
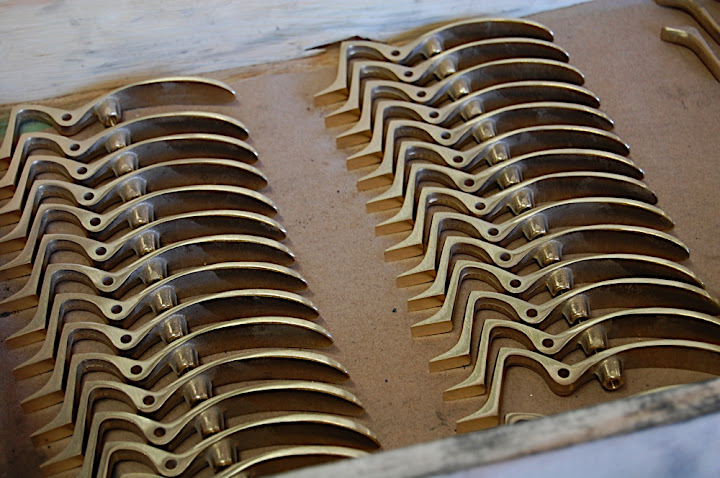
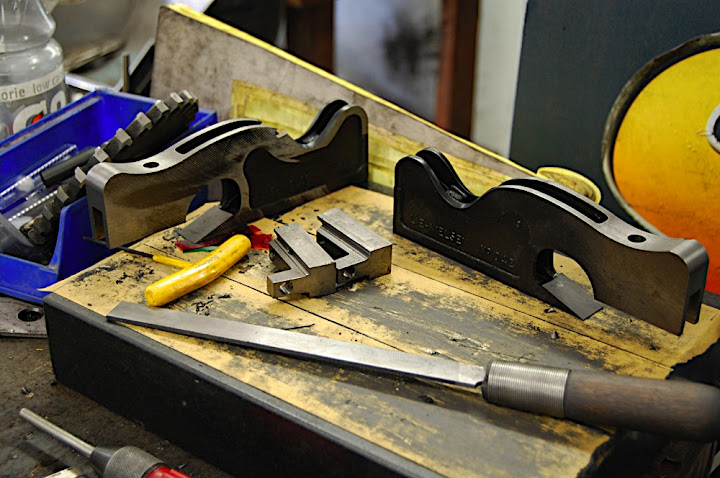
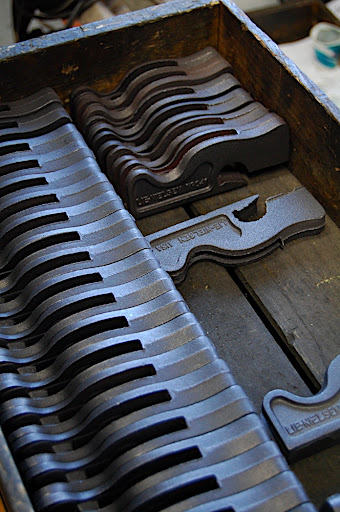
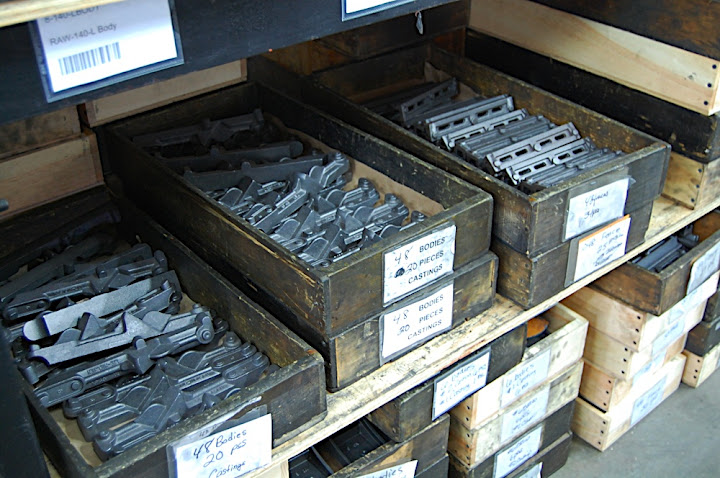
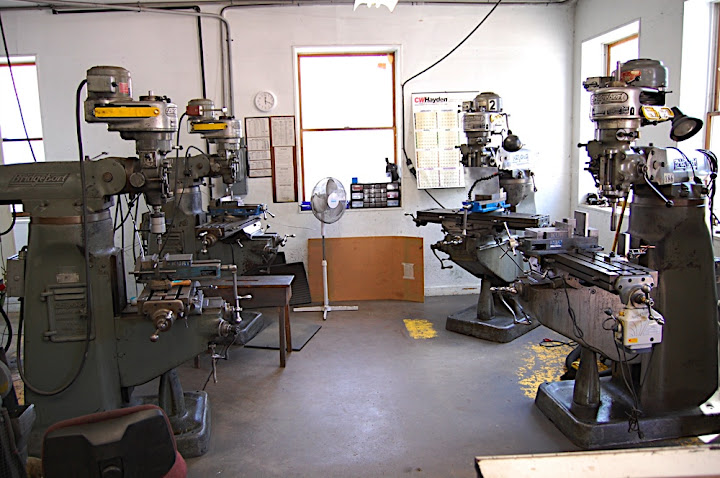
Lie Nielsen's Open House and the making of a table top – part 2: Touring the factory's floor.8/23/2010 In my last posting I said that part of the Open House event included a tour of the Lie Nielsen’s plant. Scroll down to see few of the pictures I took which show tools in different stages of machining and fitting. My favorite photo is of the # 73 rabbet plane on a granite tablet as it is being dressed up for final fit.
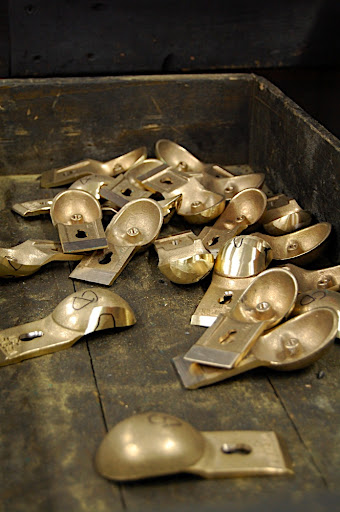
Bronze lever caps for a small rabbet plane
Small rabbet plane iron bodies
Small block plane lever caps
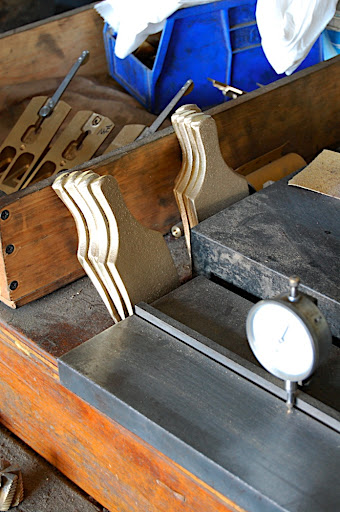
Brass shavings are being collected for future recycling
"We are good to go"
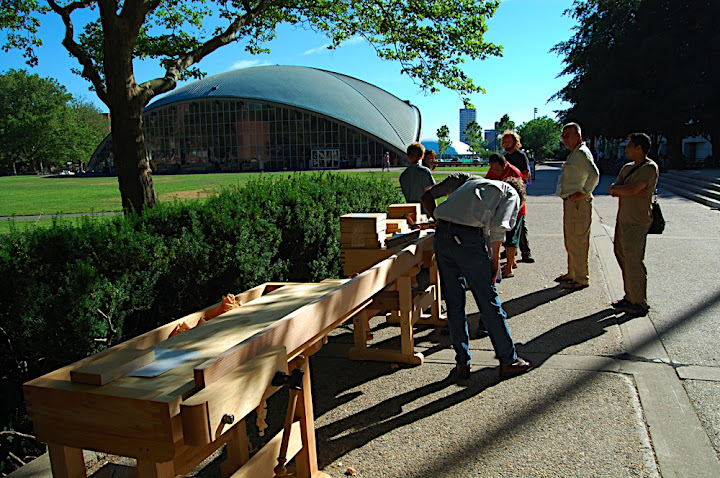
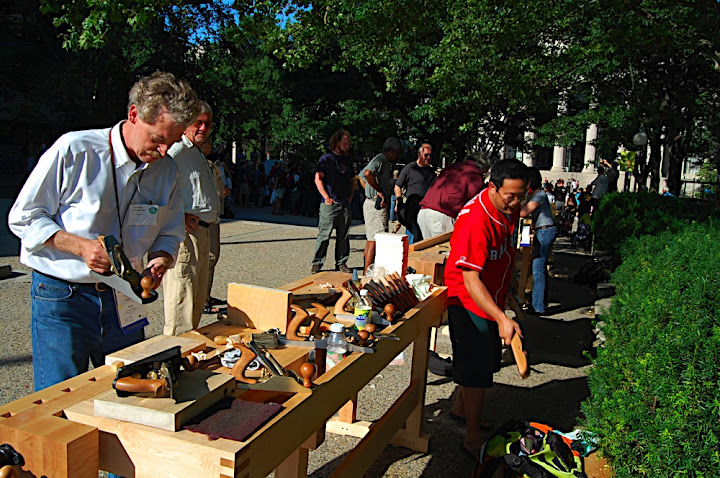
Later in the year, over the dinner table at the Furniture Society conference in MIT, he asked me if I be interested in coming over to Warren Maine for a day or two, to join a group of wood artist, tool makers, and woodworking educators who are to “set up shop” on the Lie Nielsen factory floor, and demonstrate to the guests what we do. We talked about the stuff I can show and demonstrate, and what kind of project I would/could work on during the Open House.
After few days I came up with a plan: I will bring with me the dismantled parts of an old Harvard College book case that I found in the trash, and transform the beaten-up oak boards into a coffee table top. I finished building the coffee table two years ago but I haven't built the top yet; the open house event was just the right incentive and setting I needed to complete this project.
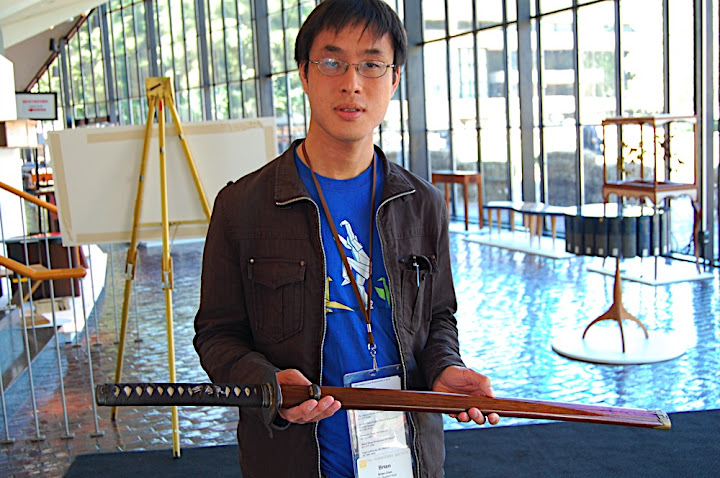
Few weeks passed and I was on my way to Maine. My friend Brian Chan joined me for the ride. Brian who is a brilliant metal and wood artist (a sword maker and more), an origami master and an innovator, is entitled for few posting on my blog too – which I promises to write about in the future. The ride was uneventful except for an unbelievable thunder storm that came down on us while crossing the boarder between New Hampshire and Maine.
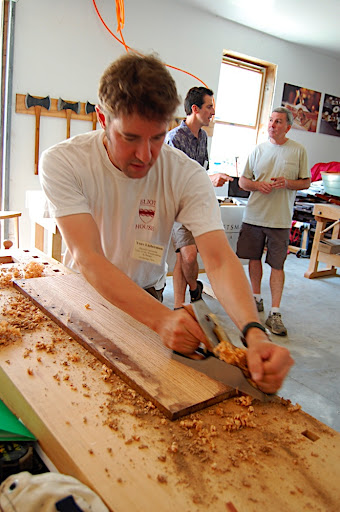
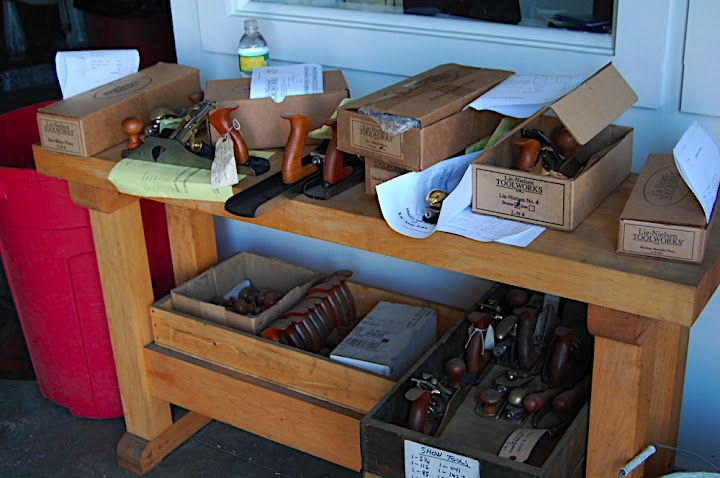
On Saturday morning I got one of Lie Nielsen's state-of-the-art work benches, and got ready to start crafting my new table top.
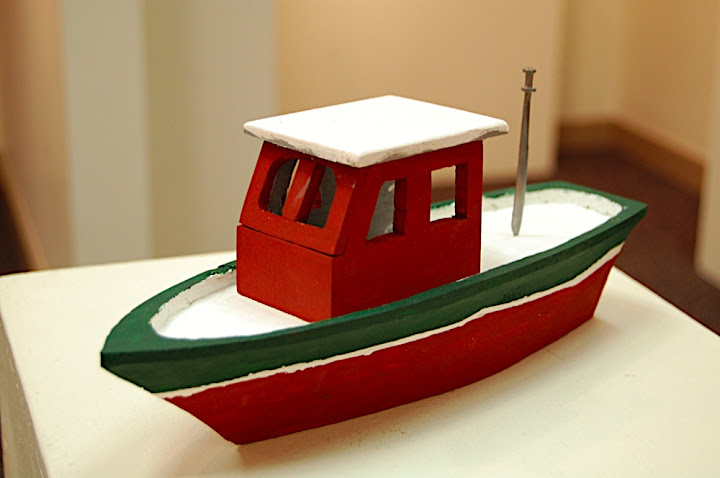
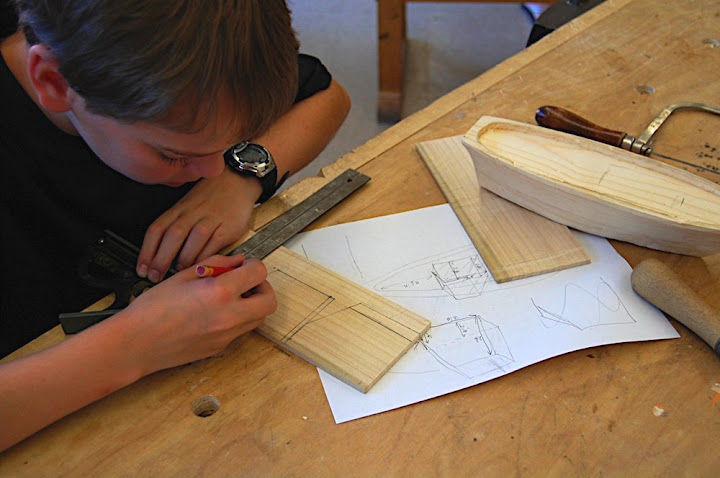
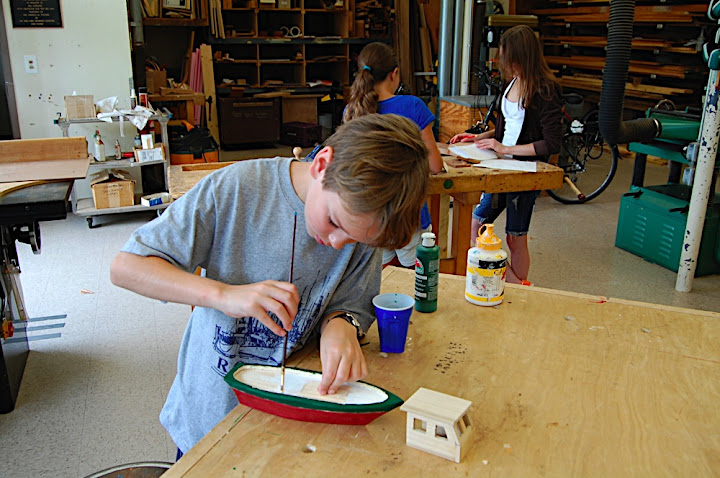
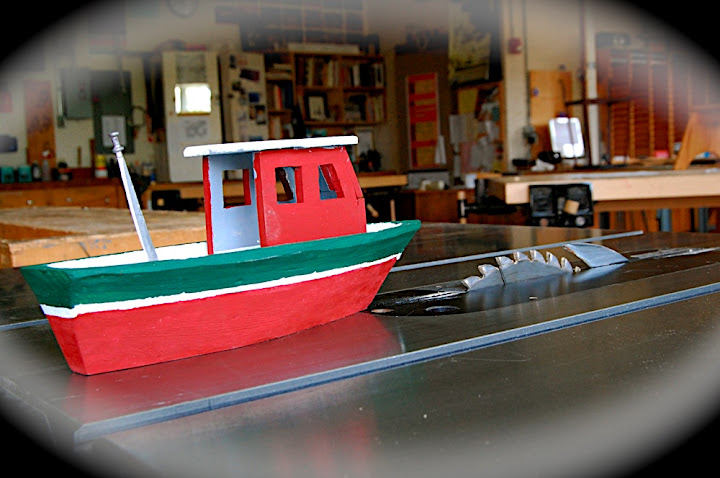
William’s first woodworking project was a New England trawler boat. The kind of boat you see in the quaint harbors of shore towns and villages along the North East coast. He started by devising a plan: a plan/top view, side view and cross section of the hull. From these drawings we extracted plans for each of the three plies, which after laminated together, made the boat hull blank.
|
AuthorI will share with you my own work, tools, and techniques. I will show how my friends and students build beautiful objects. Sometimes I will talk about wood, forests, sustainability and much more. I am sure it will be interesting Archives
January 2011
Categories
All
|


 RSS Feed
