|
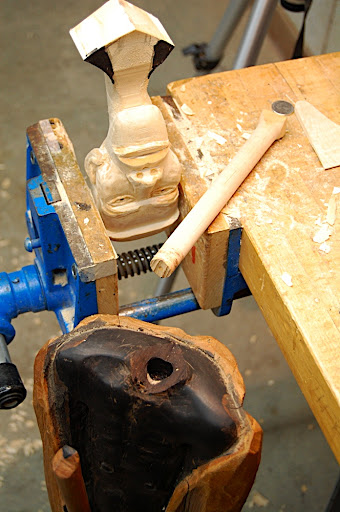
Once the dowel was made and the holes were formed, I whittled down the neck base so it will fit better into the "V" shape socket on the sculpture. I marked the surplus wood black and cut it out with a gouge.
Next, I put glue in the holes and on the dowels, and pressed the parts together.
Lastly I shaped the neck to nicely integrate it with the shoulder area. Next time I will show how I finished the piece using milk paint.
0 Comments
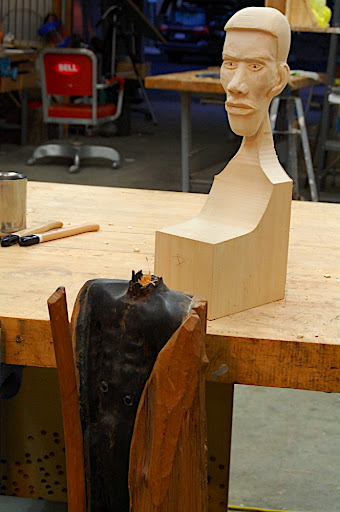
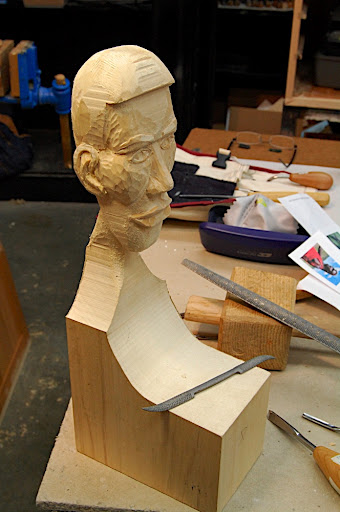
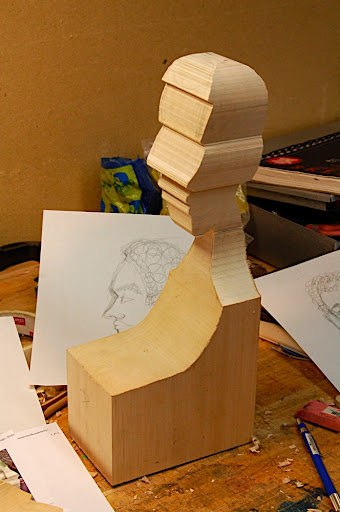
After I finished carving the head I turned to do the more accurate task of shaping and installing the neck to the body.
Firstly I cut the neck base to in the shape of a "V"; this way the transition seam will look less conspicuous than if I had cut if flat, plus, a "V" shape will anchor the neck in a stronger way.
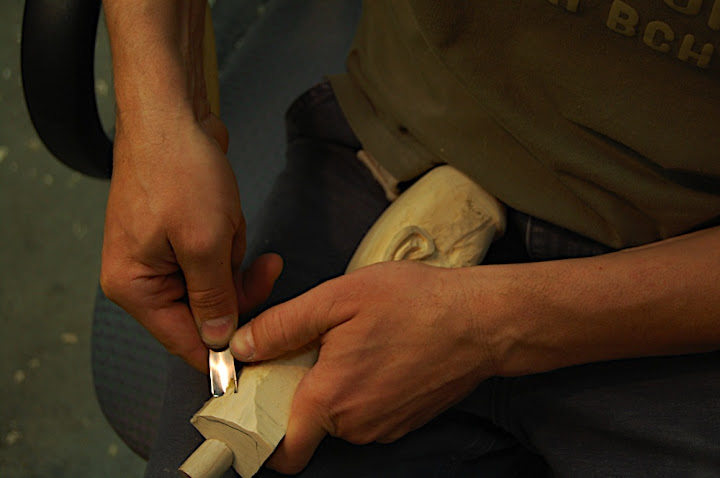
Secondly I cut a complementary "V" shape recess on the neck base – between the shoulders. After this I turned a step dowel on the lathe to serve as a connecting agent between the neck and the body. In situations like these, when you need to drill matching holes in two separate parts and make sure that the holes are in prefect alignment, I do the following: I tap a small brad into one of the parts. With a cut nippers I decapitate the head of the brad to about 1/8" abouve the sarfae. Than I take the other part and set the two together, pressing down on the cut brad. Now I separate the parts and extract the brad. The two remaining puncture holes serve as locus for drilling the holes where the dowel parts will sit in. I made a step-dowel that is narrower in the neck and wider when it is installed in the body of the sculpture.
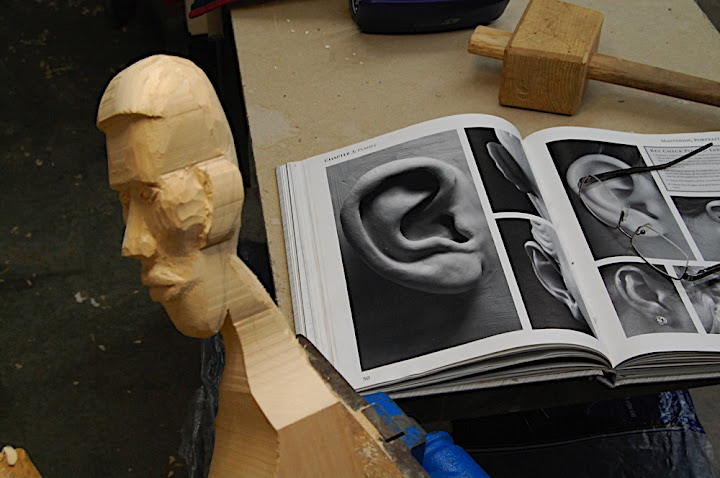
As I started going deeper and deeper into details, I realized that for some details a reference source is really necessary. Carving the ears was such a case where I new I needed detailed images of ears, a book or a real life model. One of our students, Trent – who is a brilliant sculptor, have books on human anatomy. The books contains photographs of clay sculptures: Heads, busts and facial features. This book also explain who to form sculptures in a very good way. Though the medium discussed in the book is clay, the principles layout and displayed there could surly benefit woodcarvers and wood sculptors. Here are the name of the books, written by Philippe & Charisse Faraut 1. Portrait Sculpting: Anatomy & Expression in Clay 2. Mastering Portraiture: Advanced Analyses of the Face Sculpted in Clay For carving the ears I used the second book.
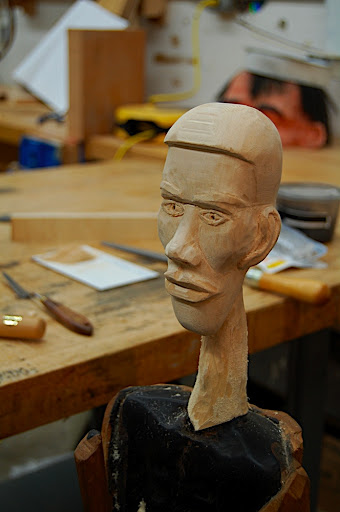
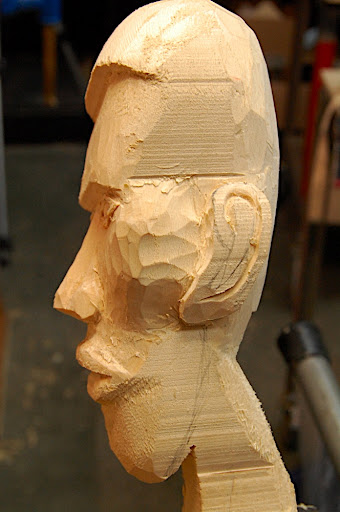
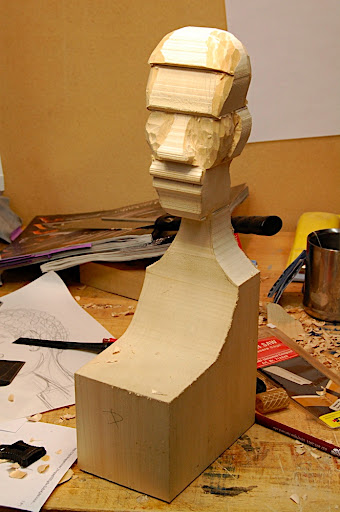
After shaping the head with the band-saw, I started to work the facial details with flat chisels and gouges. Basswood is a fantastic wood for carving: It is soft, homogeneous, and don't have a tendency to tearout. Choosing the right gouge for the job, deciding on the specific technique to reduced a block of wood into a 3D sculpture or decoration, is a very personal approach. I like to do the rough carving with a No 7 or No 5 gouge. I also like to use fishtail gouges (No 3, and 5). Occasionally I will reach-out for a carving knife in order to cut defined lines between two surfaces, or to work in areas where the gouge is just to cumbersome to handle.
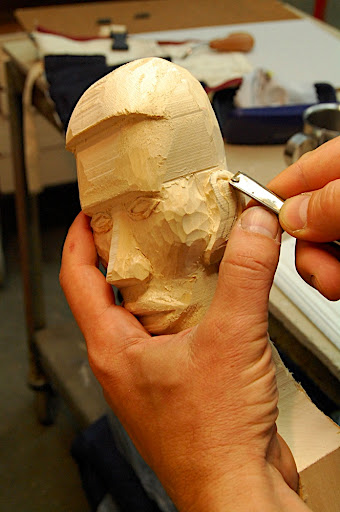
In this picture I start carving with a flat chisel. I chamfer the corners and reduce the block.
Outlining the nose is one of the first steps. Notice the gouge marks on the face (No 7 gouge)
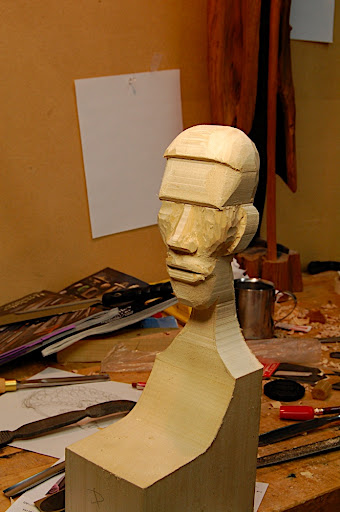
Gradually I started to shape the mouth. Next time I will describe the process of going into carving details.
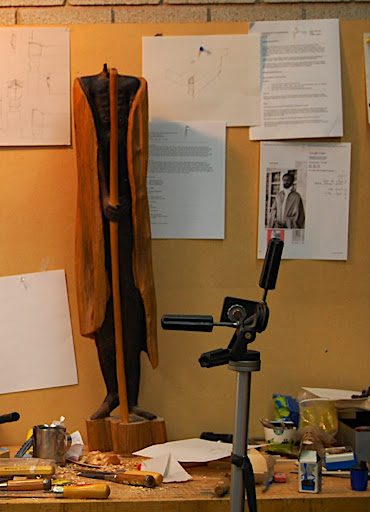
In September I arrived to Purchase College to spend the semester as an Artist in Residence in applied design. I mentioned this in one of my previous blog posts and commended the woodworking program here. My first project was a reconstruction of a head that gone missing... yes exactly like this! A head that I never saw, but only heard of. The missing-head sculpture is part of an impressive collection of ethnographic artifacts which belongs to the grandfather of a close friend. At some point, while the family was moving form one house to another the impressive Masai worrier was decapitated. Oliver, the owner of this piece, kept the head but at one point it got lost. So when I took the sculpture body to set up a plan to carve a new head, I could only relay on some research and much interpretation of what this head looked or could look like. Oliver gave me free hand to execute an artistic freedom and interpret what I think should be the form and aesthetics of the new head. I loosely base the new head on pictures of Kanyan warriors and Israeli warriors of Ethiopian descent.
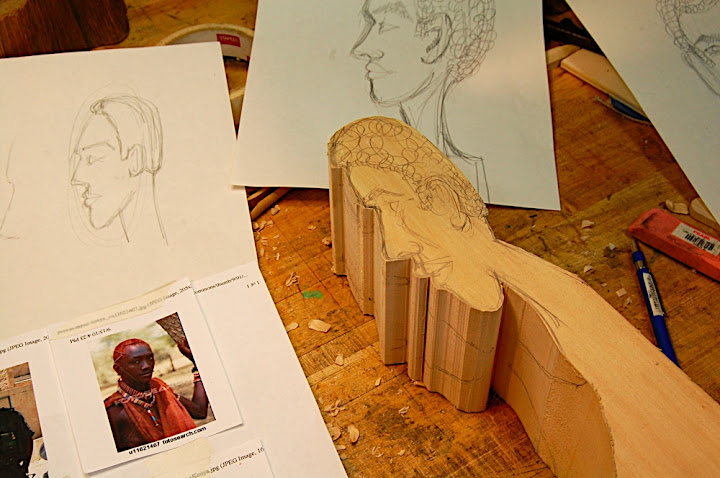
I first drew several sketches/alternatives of the head's front and side view. Then I transferred the sketches onto a piece of basswood that I found. The shape of the basswood determined the actual propositions of the head; it was rather long and narrow. I band-sawed the side profile, then I turn the head 90 degrees and sawed the front.
I thought that since I based part of the design on portraits of Israeli warriors of Ethiopian descent... and Ethiopia was so influential on the Rastafarian movement and Bob Marley in particular, I will end this entry with a Marley song – Buffalo soldier... Next time I will continue to show the evolution of the head.
|
AuthorI will share with you my own work, tools, and techniques. I will show how my friends and students build beautiful objects. Sometimes I will talk about wood, forests, sustainability and much more. I am sure it will be interesting Archives
January 2011
Categories
All
|


 RSS Feed
