|
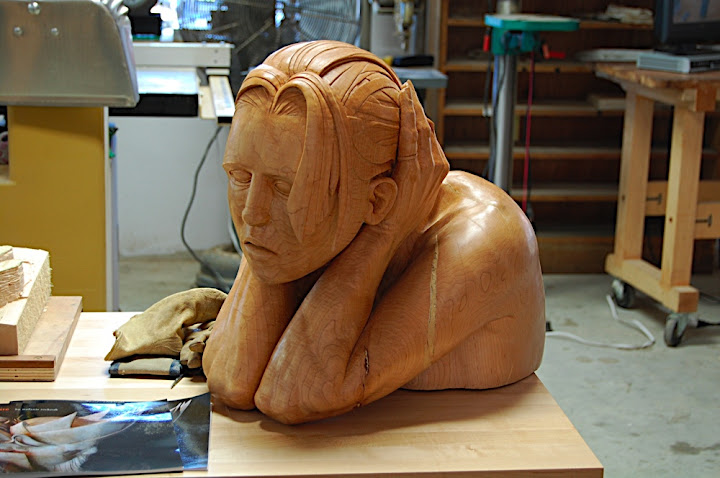
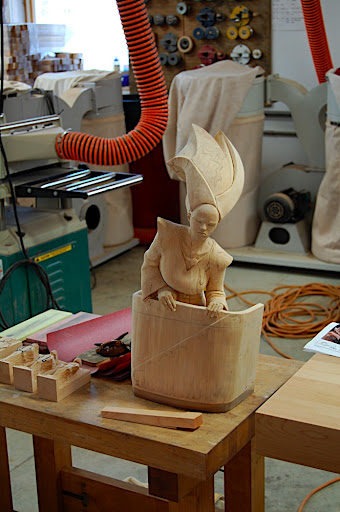
One of the remarkable artists who demonstrated her unique talent and skills at the open house, was Stefanie Rocknak. Steff is not just an amazing carver and sculpture, she is also a David Hume scholar, serving as a Professor of Philosophy at Hartwick College.
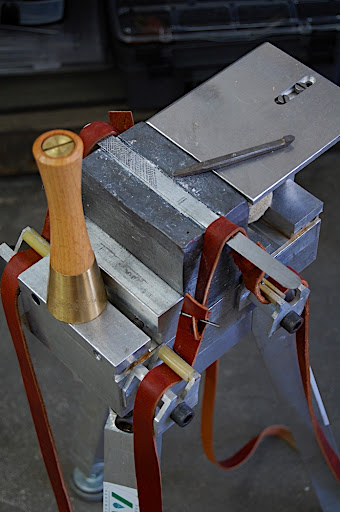
I met Michel Auriou the rasp maker form France, whose four people company makes the best hand made rasps in the world. He brought with him a tooling device which helps the worker to hold down the rasp’s blank while the teeth are formed – one by one... http://www.forge-de-saint-juery.com/
I had a very interesting conversation with Kevin Glen Drake, the maker of some of the most exquisite hand tools in the market, and the innovator of the Tite-Mark Marking Gauges. http://www.glen-drake.com/
I met Peter Follansbee a master carver form Plymouth plantation historic village in Massachusetts. Peter has a great blog about traditional woodworking.. from ... http://pfollansbee.wordpress.com/
And I met many more interesting people form across the Nation and form Canada who came over to see, to smell, and to work wood.
0 Comments
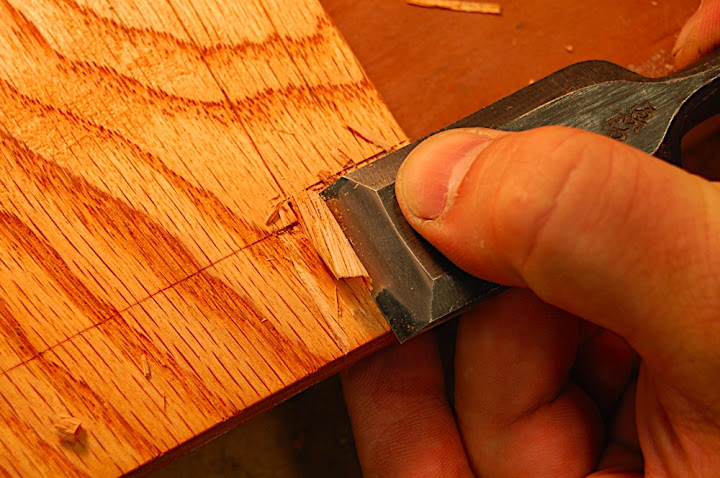
The last part in the coffee table project, was to add a corner detail to emphasize – even farther – the presence of the slanted chamfer. I decided to create an indented square at each corner which will expose the chamfer's angle and thus will make it more conspicuous.
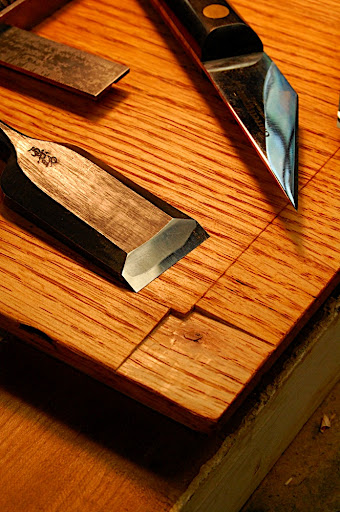
I used a chisel and made the indentation. I then painted the square black-gray (the same color as the table base. One might mistake the black-gray square as the top of the leg, but of course this is just an illusion.
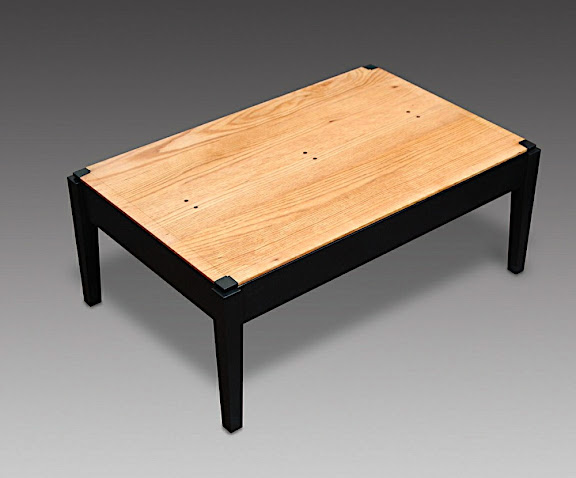
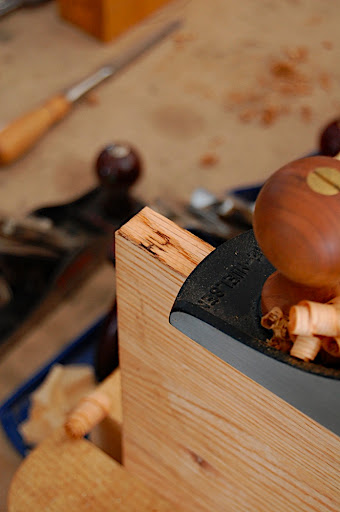
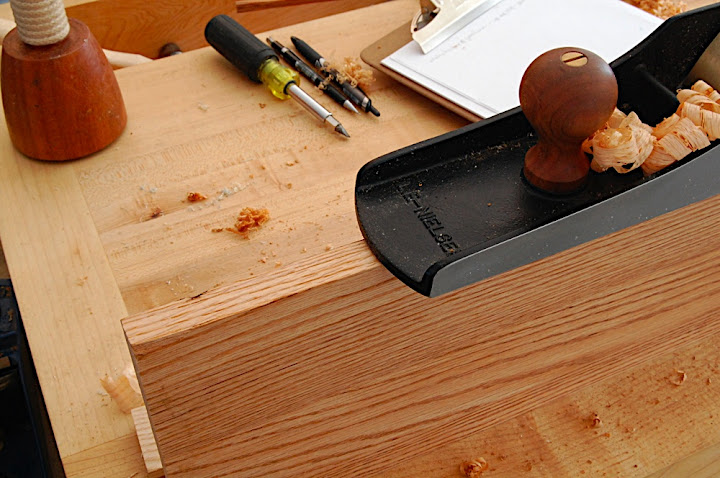
Lie Nielsen's Open House and the making of a table top – part 6: Dealing with eventualities9/19/2010 After the glue, which secure the dowels dried, I planed the dowel and its surrounding surfaces flush. Then I started to rabbet the boards edges to allow them to fit in into the table frame.
I did not want to connect the board to the frame with fasteners; it was not necessary, as I created an internal rabbet (or lip) on all the table apron/rails which will accept the rabbet on the table top.
But then alas...!
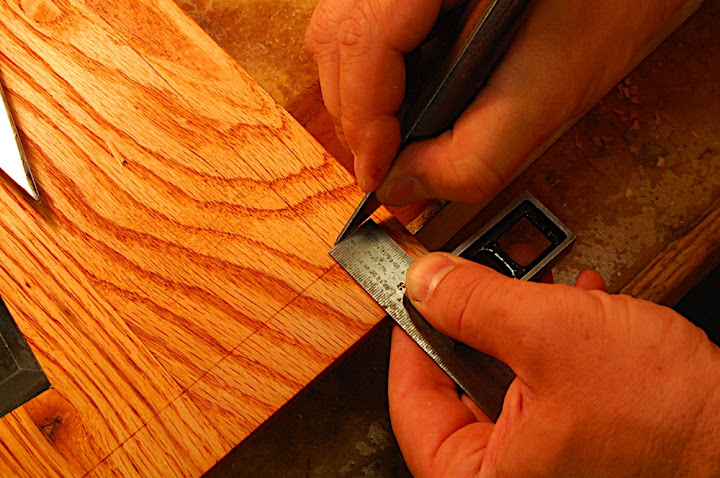
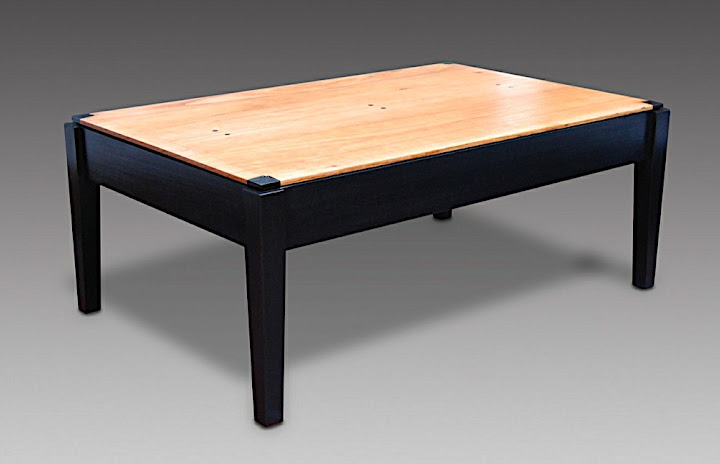
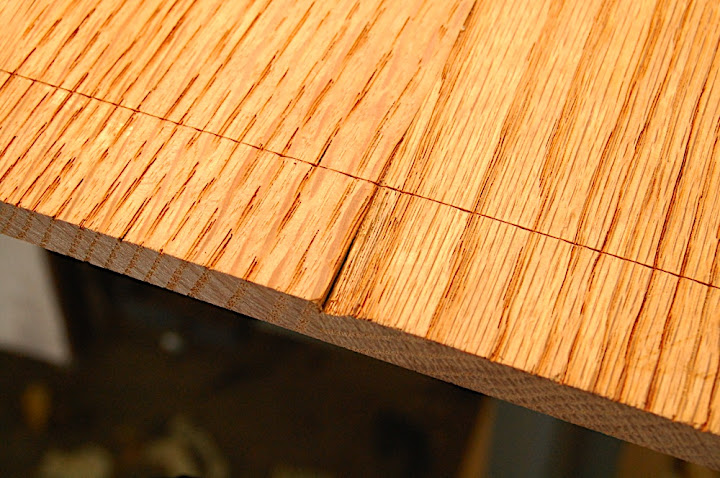
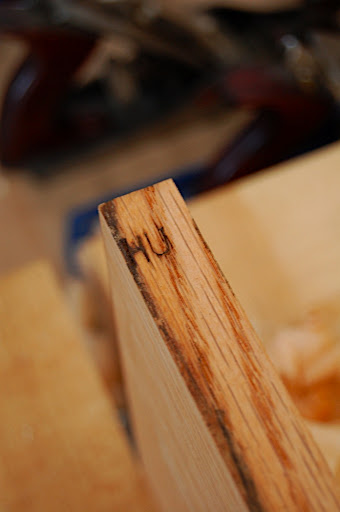
It was a pity but actually not such a bad one. As it happen often: mistakes and accidents can lead to discoveries. In this case, and instead of trying to embark on a restoration mission (fitting a replacement piece of oak and then planing it down) I decided to change the design a bit. I went on to create a slanted chamfer on all edges. I planed the chamfer until the missing wood chip blended in the angled strip. Before starting to plane the chamfer I scored its parameters. I did it for two reasons: to help me know when to stop planing; and to create a defined transition line between the chamfer and the table top.
You see, it would be very difficult to recognize a chamfer of such a subtle slanting angel – as an intended design feature – without the border line. When it is difficult to pinpoint a transition between structures or materials, people tend not to notice it.... or worth: think that the maker made a mistake or neglected to think the design through.
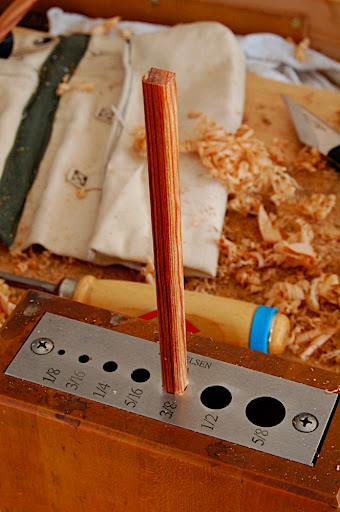
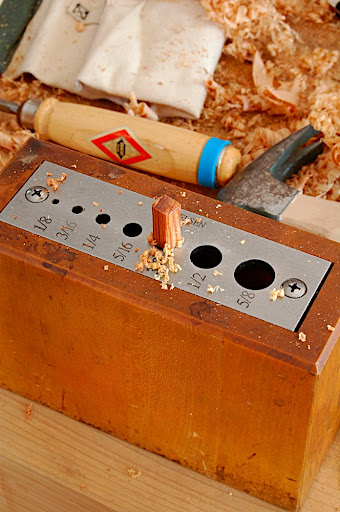
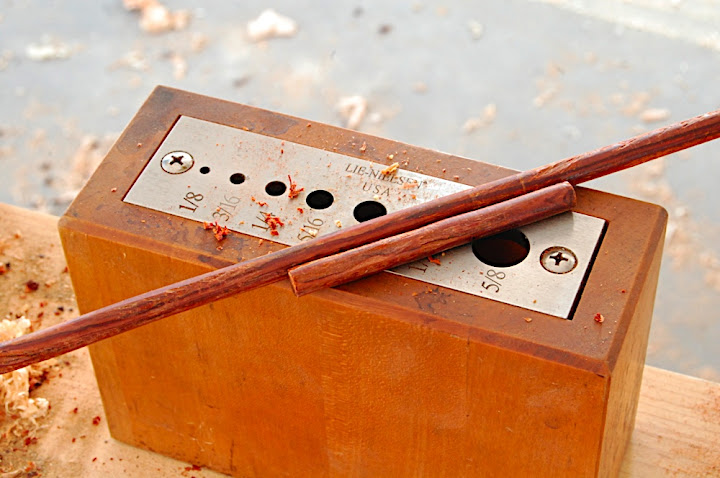
After making the keys and forming all the the mortises, I made the dowels. To make a dowel I first used the band saw to re-saw and form a square shape rod. Then I forced it into a hole in a dowel maker (dowel maker in a steel plate that has tapered holes in deferent dowel diameter.
I found out that some woods, like Bubinga or Heard pine, will not shave so nicely while others, such as birch or maple will be easier to form. However, I choose Bubinga for its beauty and contrasting effect on the oak.
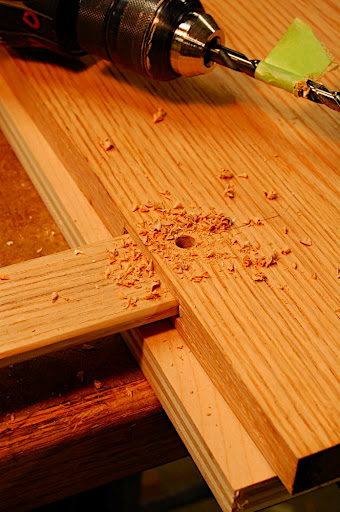
After the glue dried I drilled a hole that passed from one face of the board to the other, penetrating through the key. Than I inserted the dowel to secure the key – just in case, and for appearance purposes. Then came the crucial part of drilling and alighting the holes on the other side of the board, so that once the dowels are inserted the it will force the joint between the boards to close; enough to make the dowel to spring and pull the key inside the mortise and consequently the edges tighter.
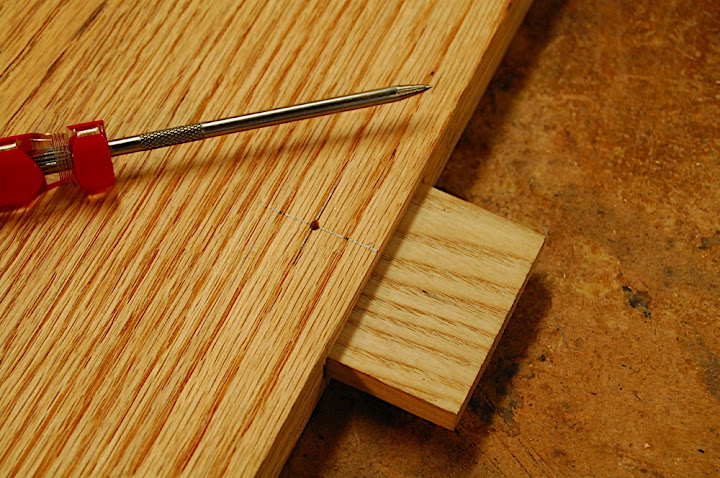
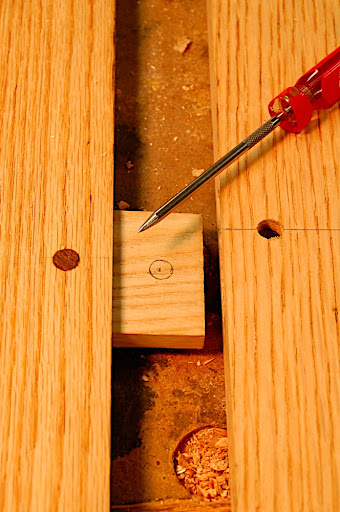
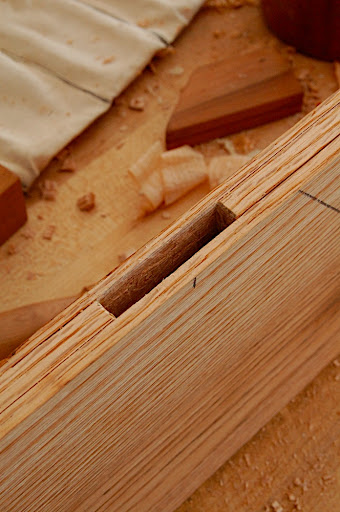
Than I inserted the facing boards and its keys to the mortises and marked out the circumference of the entry hole onto the key.
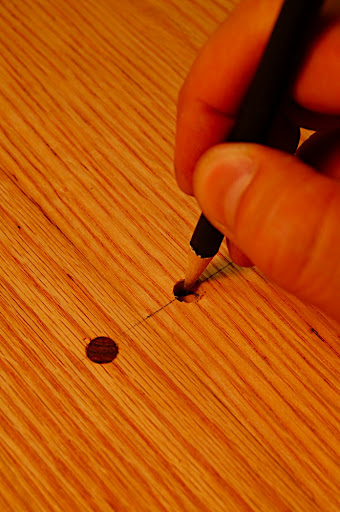
The next step was to indent an of-center point on the marked out circle. I drilled the of-center hole, brushed glue in the mortises, on the keys and on the edges and pressed the parts together. Then I drove the dowels in (with some glue) and saw how they pul the joint tight.
The most common and easy way to glue two boards together (in order to make a wider board) is to joint the edges, apply adhesive and clamp them under pressure until the adhesive cures. Occasionally we will add biscuits or a splines in between the edges; in other cases, when we need to make a superior joint with greater contact surfaces between the two edges, we will use a special router or shaper bit to make a series of grooves and complimentary ridges that will fit into the grooves.
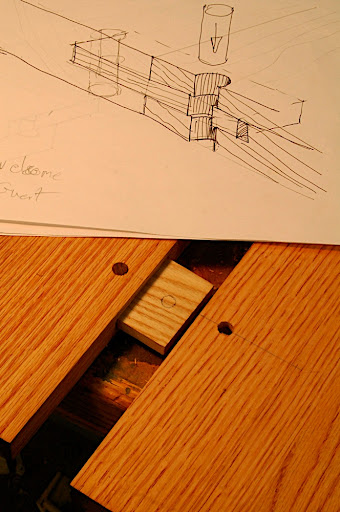
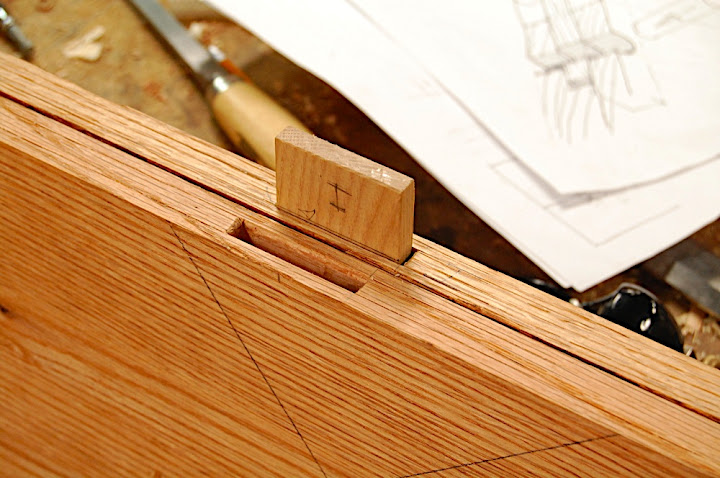
In the case of the table top I built, I choose a third technic. Few years ago I read a book on country furniture making, written and illustrated by George Buchanan: The Kitchen – Timeless Traditional Woodworking Projects. While reading this book I’v learned how to join boards without the assistance of clamps. A key is inserted into the edge of the two boards, than pegs are inserted into the boards to secure the keys. But the pegs have a much more important mission. As the holes in the keys and the boards are intentionally not in complete alignment, diving the peg into place will create a force to pull the two edges together (see illustration attached).
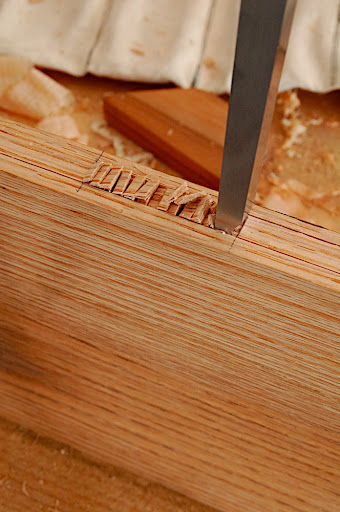
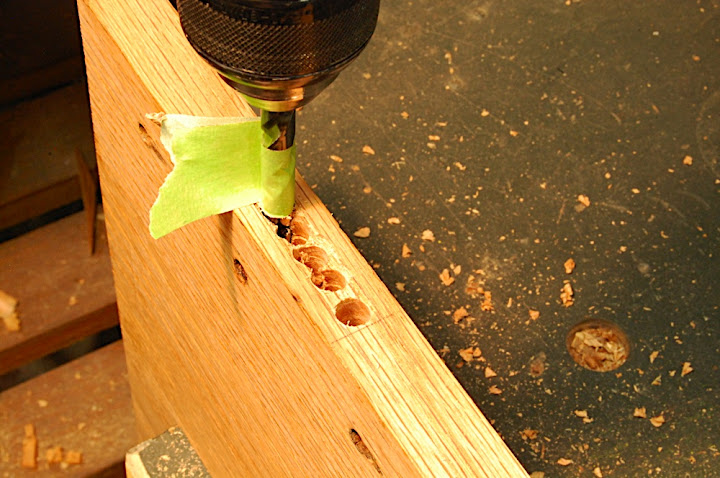
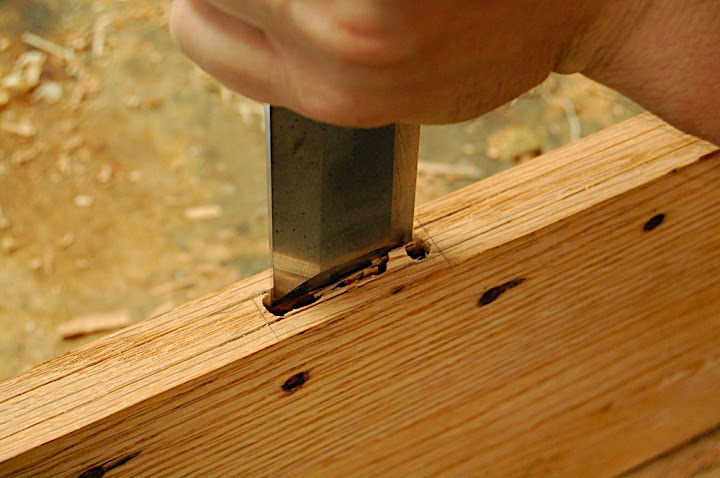
The hole in the key is off seted by a tiny amount – enough to make the peg spring and pull the key inside the mortise and consequently the edges tighter. I made the keys from ash. At Lie Nielsen’s open house event I used mortising chisels to crated the mortises. Later on in my studio, I finished the remaining mortises by combining together the force of a cordless drill, a mortise chisel (for the mortise narrow edge) and a bench chisel on the long edges.
|
AuthorI will share with you my own work, tools, and techniques. I will show how my friends and students build beautiful objects. Sometimes I will talk about wood, forests, sustainability and much more. I am sure it will be interesting Archives
January 2011
Categories
All
|


 RSS Feed
