|
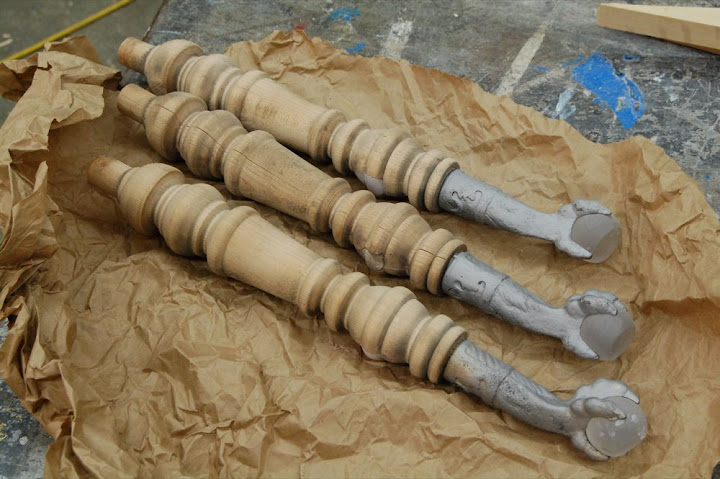
A few years ago my friend Robin gave me three wood & cast iron legs which used to be part of her grandmother's piano stool. Robin said to me: "Yoav, you make great things from found objects, maybe you'll find some use for these legs". A few years passed and Robin and her boyfriend, Chris, got married. So I said to myself, this is a great opportunity to make something out of these legs. It took me more time – much more time than the customary one year grace-period one has to give a wedding gift, but I am after all an artist, and as you all know, an artist's time can be stretched..
The legs wood finish was all ruined; the cast iron ball and claw feet were rusted; the balls themselves were chipped or broken... so I decided to take a drastic measure: to sand-blast them and get rid of many of these inflictions. Then came the question of what to do with the open mortises that used to house the original (and missing) rails, and of course – what am I going to do with the legs? The answer came in the shape of a broken glass lid that embraced a round walnut plate. I found these items on one of the shelves in the Artist-in-Resident space at Purchase.
0 Comments
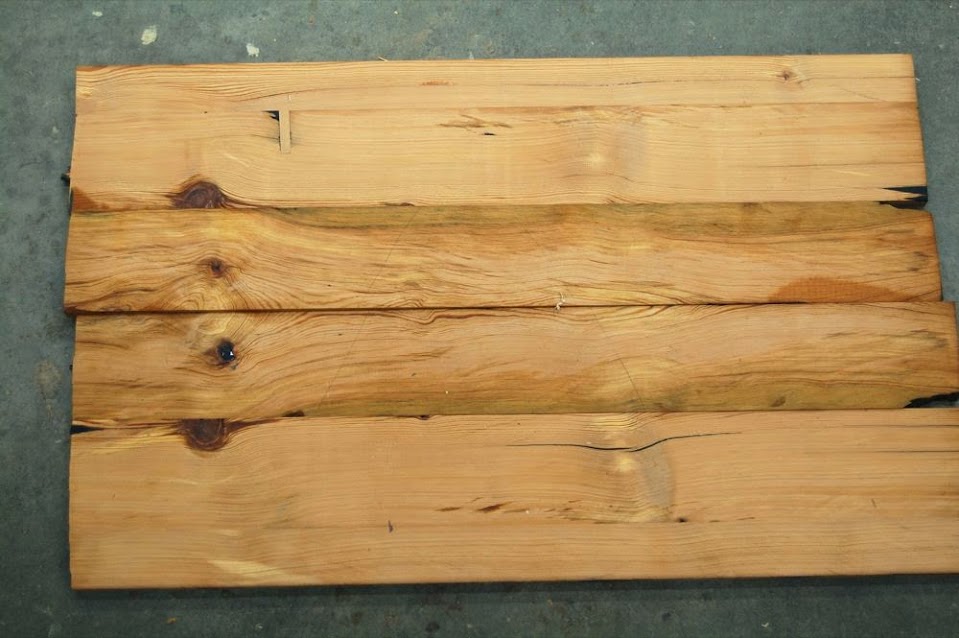
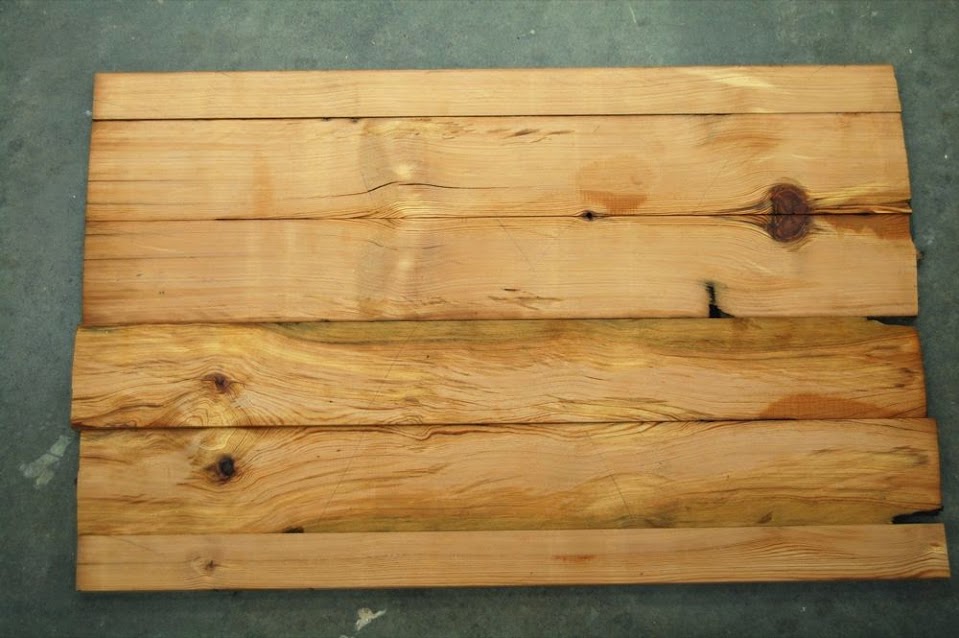
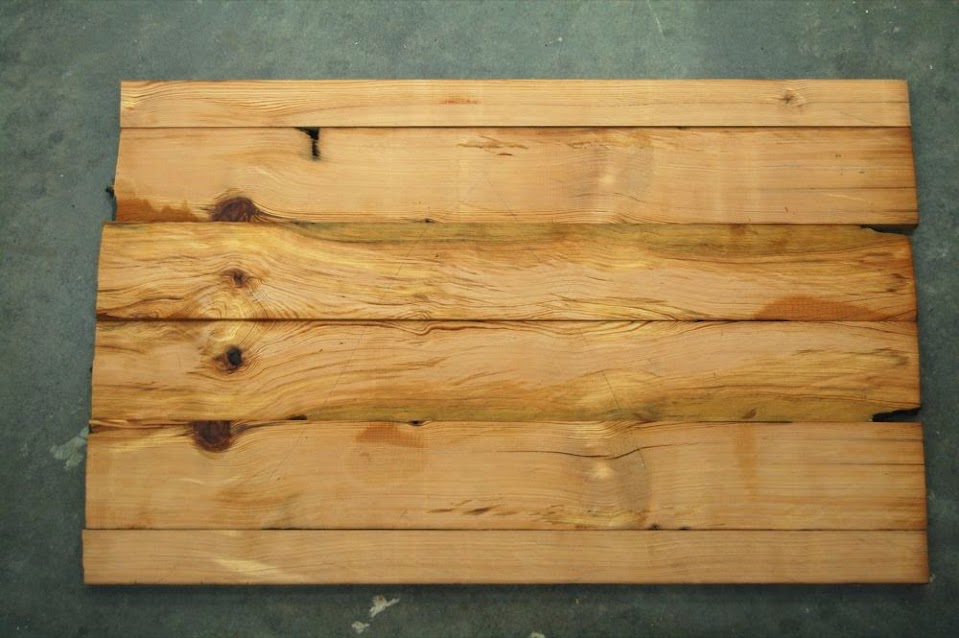
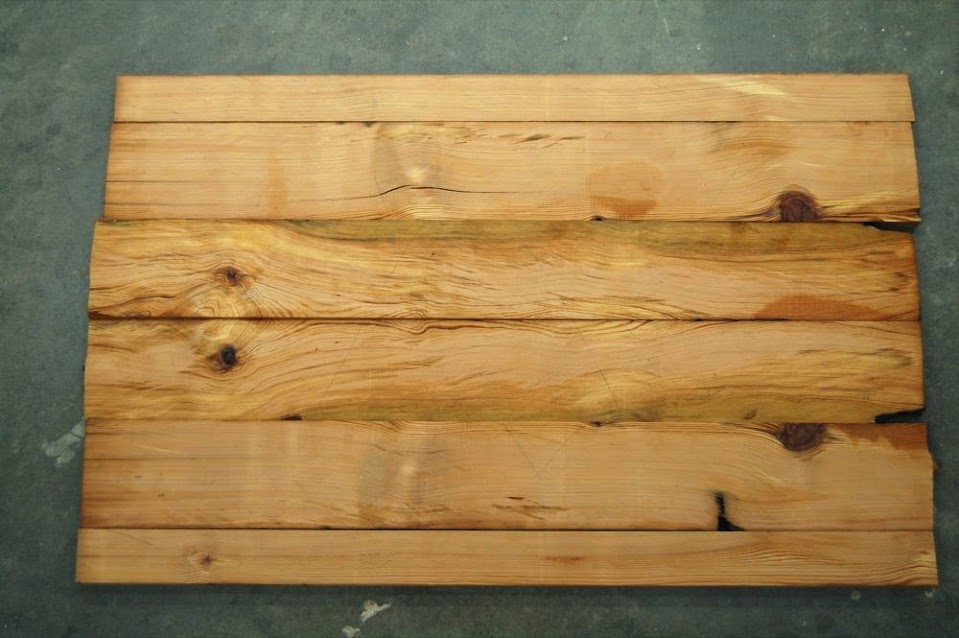
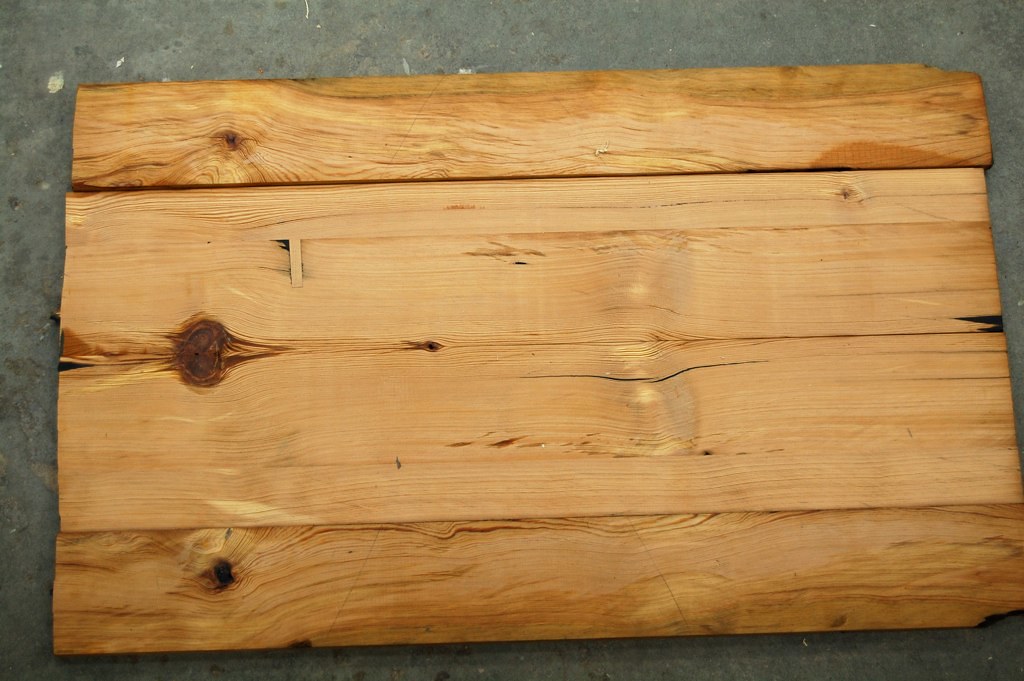
Can Facebook be a design tool?.... well it depends... Recently I needed to decide on the most interesting board orientation for the table top I was building in Purchase College. I had five or six heart-pine boards that I salvaged, and could not make up my mind as to what should be the best way to connect them together in order to make an attractive looking tabletop. So, I decided to bring this up with my facebook friends. I posted three images of the different configurations (I was contemplating with) and ask my fellow facebookers to grade them: form the most attractive to the least attractive. A few of my friends added the reasoning behind their decision, others just cast their ballot. Here are the images:
At the end of the day I took all my friends views into consideration, processed them and made a new (fourth) composition that included book-matching symmetry and which called for all eyes to be placed on one side of the table top.
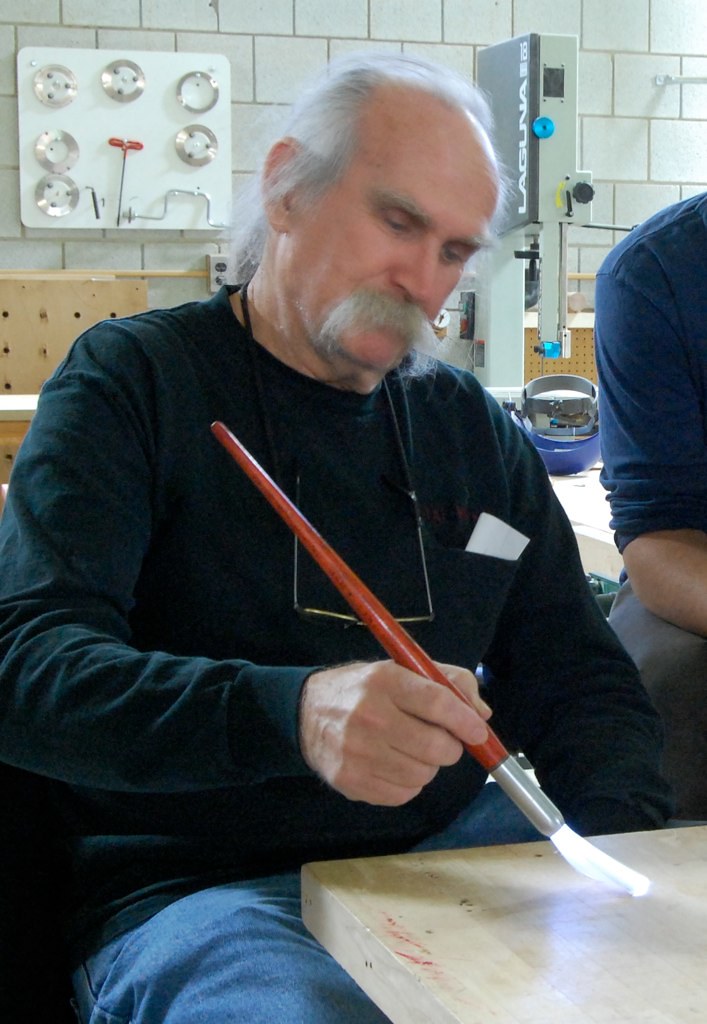
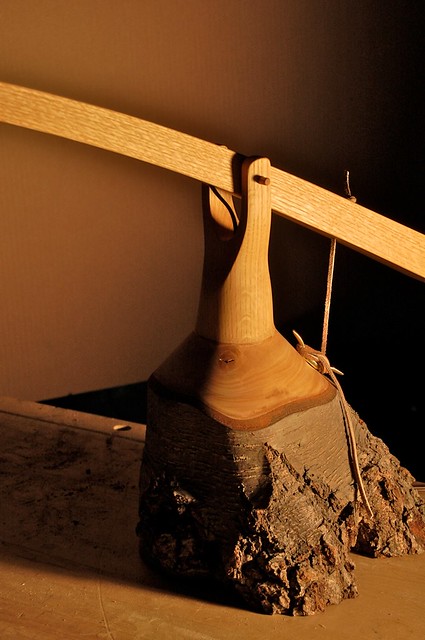
Among my students last semester was one of the worlds best turners, and arguably the best turning teacher I have met. During this term Andy was more my teacher than my student. Before meeting Andy I thought I knew how to turn; now I know that I was merely a beginner. Andy teaches a turning class in Purchase College and everybody can join this class, not just Purchase students. He is a gifted teacher and his techniques work every single time. He is also a writer on Wood-turning and has contributed many articles in the field. Andy's idea for the Lamp Assignment was a light brush. He turned a brush body and mounted it with an LED light cupolaed with some light transmuting thin plastic hairs – to carry the light wave down from the LED source to the brush tips. Andy is going to embark on a more ambitious task, and harness this method for building a furniture.. Andy's Brush:
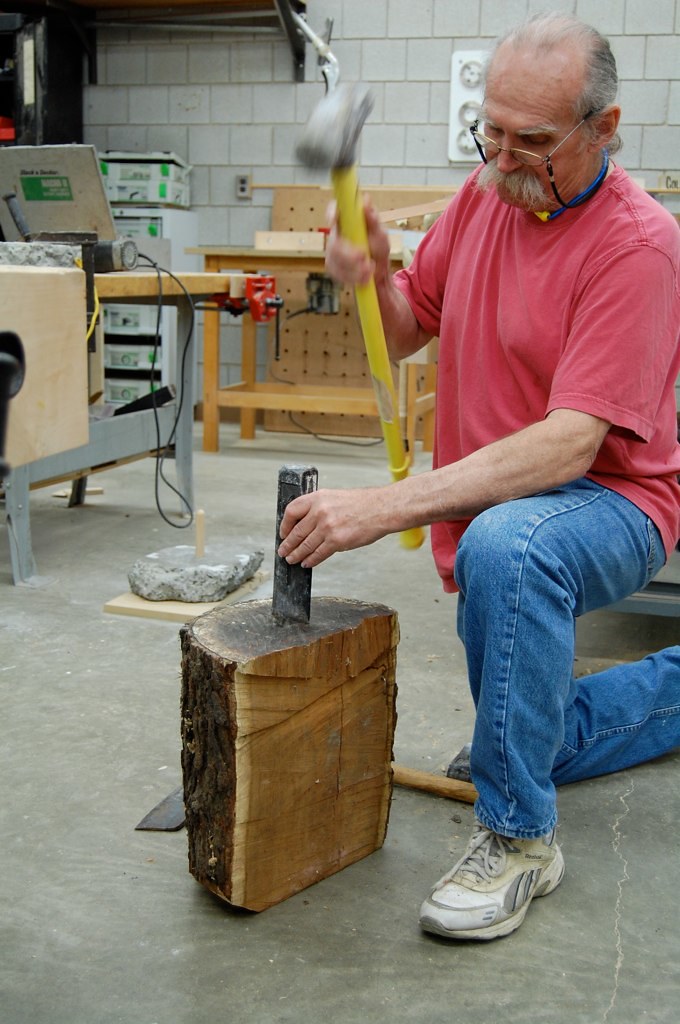
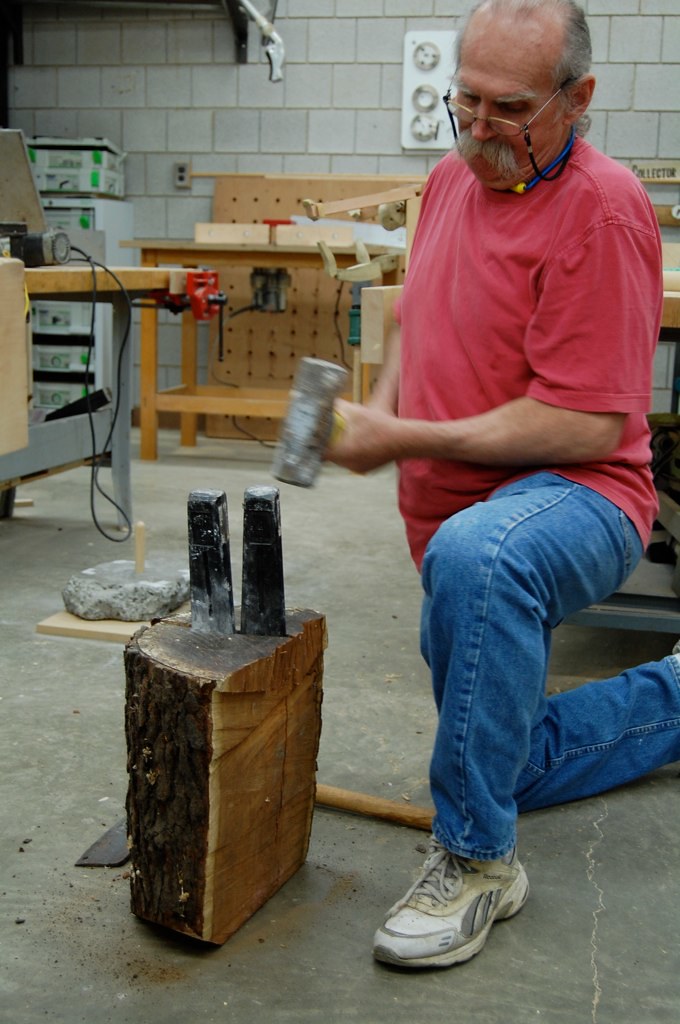
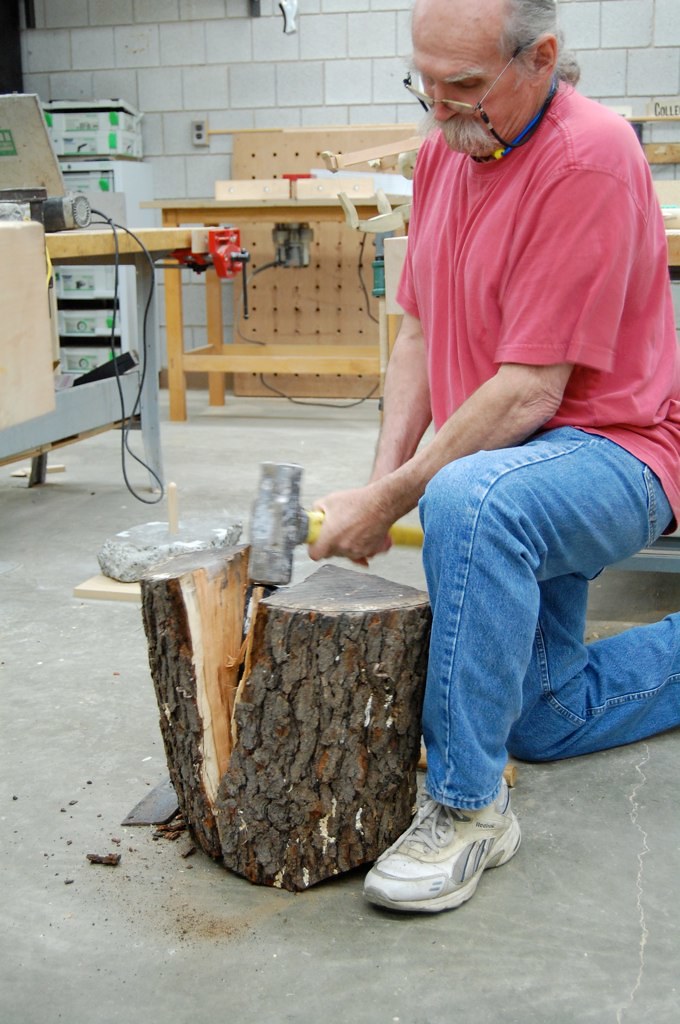
Andy splitting a Cherry slab for a turning project:
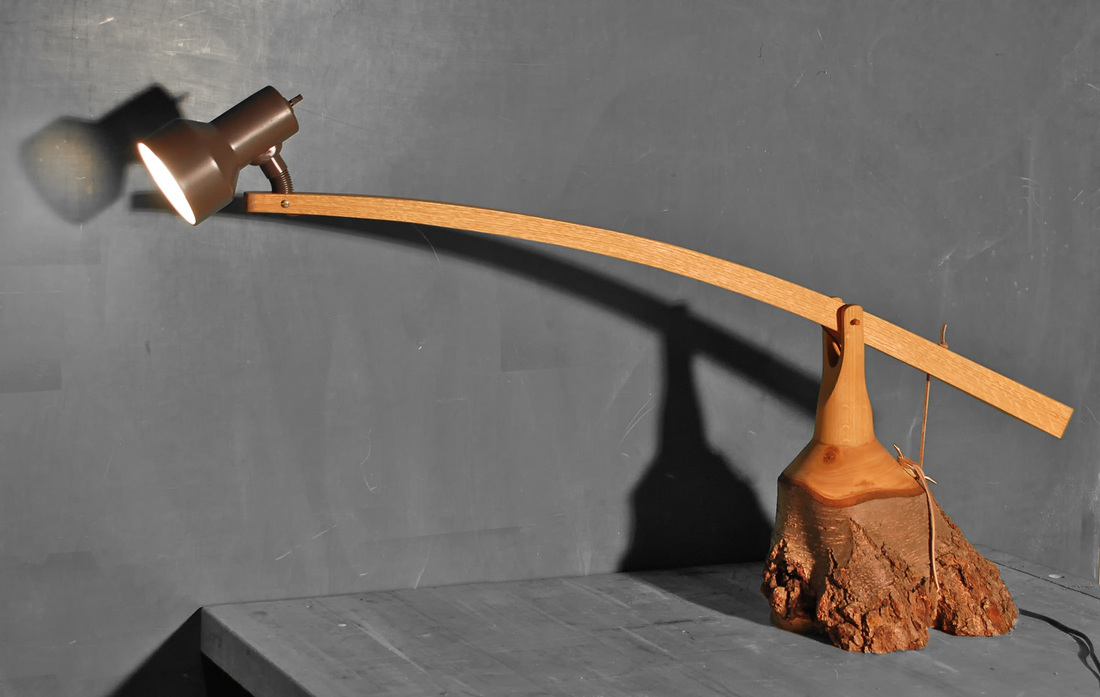 While at Purchase College I taught a class labeled "Applied Design". What we did was to go through a ratcheted-up four assignment curricular that culminated in designing and building a full-scale functional piece of furniture. The third, and very interesting assignment, was to build a lamp. I wrote about Robert's lamp before and now I wanted to show you another lamp built by Doug Watters. Doug is a professional furniture maker who took my class to hone his design skills. He is a gifted turner and the lamp he built demonstrates this perfectly. The base was turned separately form the yolk. The arm is laminated oak. To set its' angle you need to pull or loosen a leather strap that is secured to the base with a wrapped-around maritime cleat made from bronze.
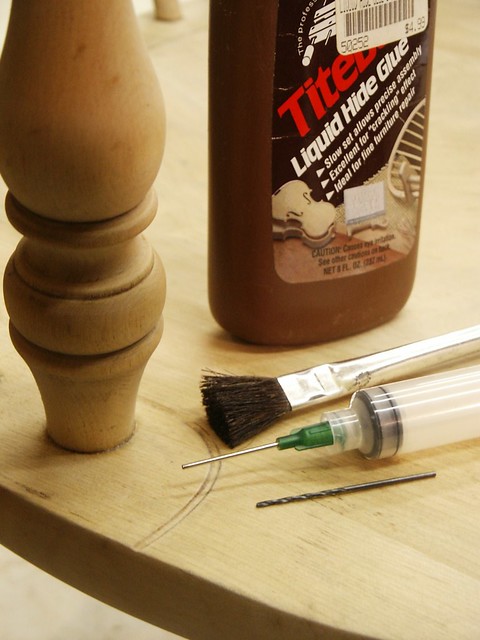
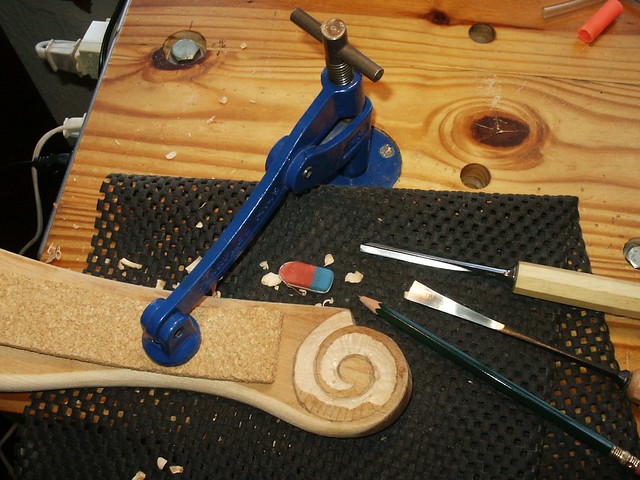
Carving the chair's crest rail was fun, and I think that adding the scroll detail improved it. The next step was to glue the parts together. In some cases, where parts were not disconnected but just loose, I injected glue in between the tenons and the mortises; I used liquid hide glue throughout the proses. To inject glue in between tenons and mortises I drilled a hole and inserted a syringe to force the glue in.
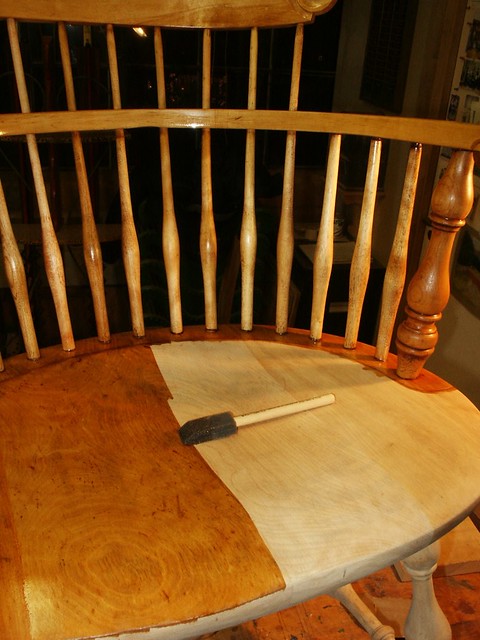
After the glue dried I sanded the chair and applied two layers of polyurethane clear finish.
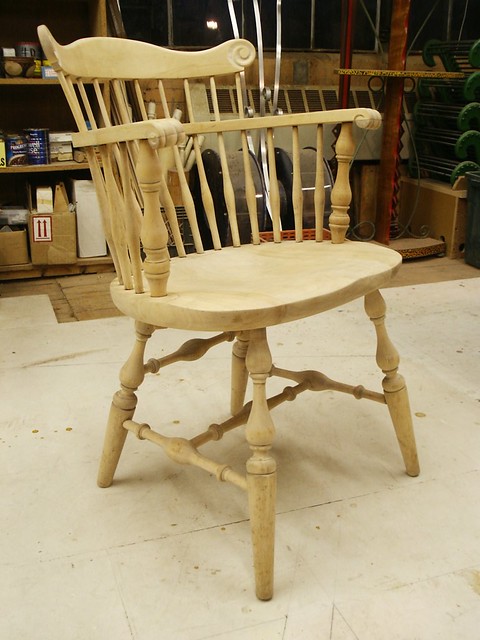
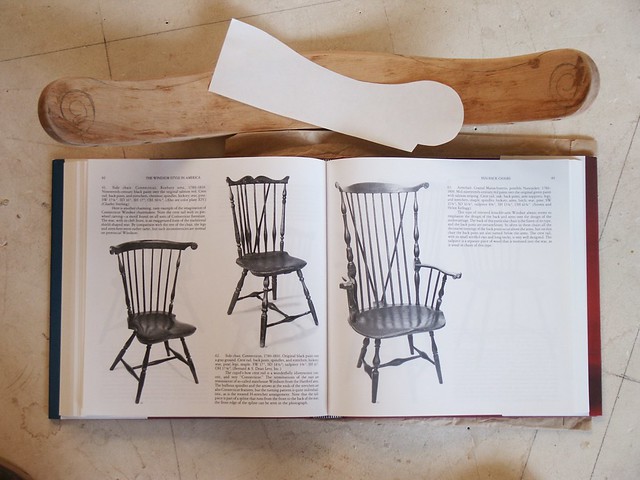
Once I finished stripping the old finish, I started planning the necessary repairs and alterations. I had to make two new spindles. To compensate for the missing ones, I had to re-glue a loose carved detail under the arm rest and to decide how to make the comb back a bit more elegant so that it would look nicer than the original. To be inspired and plan the change, I opened one of my books – The Windsor Style in America: The Definitive Pictorial Study of the History and Regional Characteristics of the Most Popular Furniture Form of 18th Century America 1730-1840 (Vol 1 & 2). I looked at the different shapes of the scrolls that decorate the steam-bent, curved crest rail. The most beautiful Windsors have delicately carved ears; and this is what I decided to do..
I examined few of the regional chairs built in New England in late 18 century, and borrowed one of the scroll designs. I made a template of half of the outline of the future crest, then I traced the design on the chair's crest and curved it. I also narrowed the crest to make it less bulky.
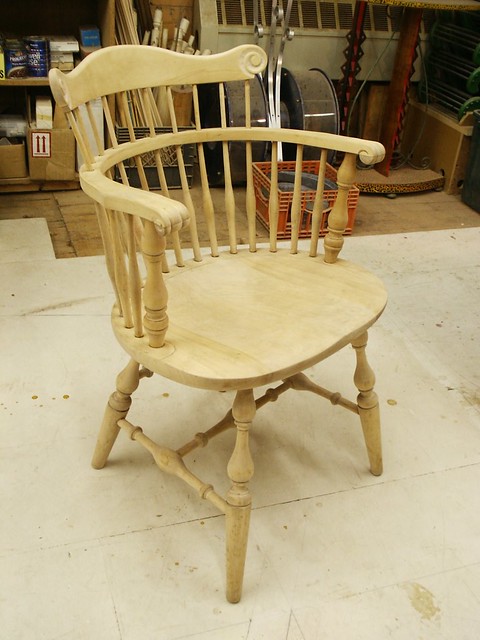
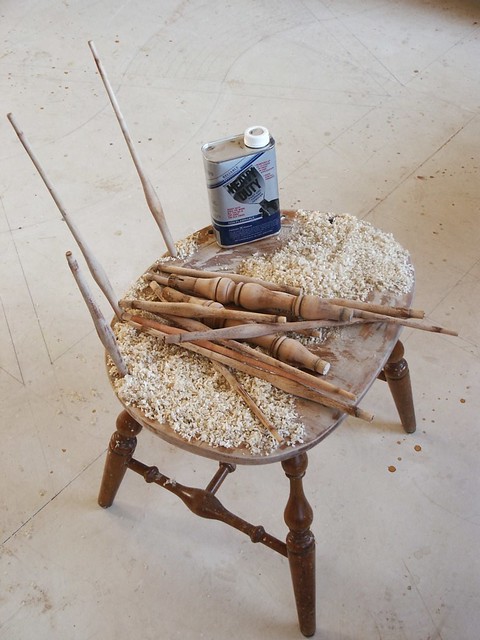
A few years ago I found an old Windsor chair near the dumpster of one of the buildings in Harvard. It was a snowy day and, when I picked up the chair, I saw that it suffered from few problems - loose legs and stretchers, missing and broken spindles. I am sure that these were the reasons it was tossed away from the department/office it used to live in. I decided to restore it and add a detail or two to make it stand out. The first step was to extract the sockets and all the loose parts from their mortises. The next step was to start the stripping process – as the old chair was covered with chipped, cracked and peeled off polyurethane finish.
Honestly, I really don't like stripping finishes. This is because stripping agents are among the more harsh materials in our woodworking world, and in order use them one needs to take extra care, wear gloves and even a respirator.
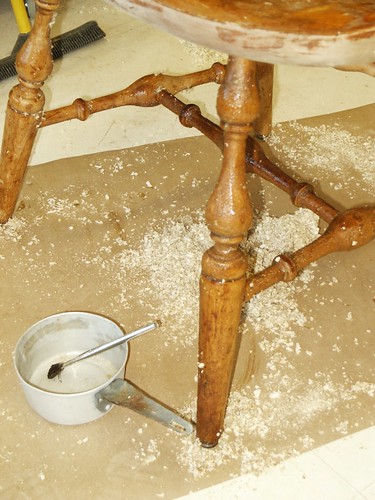
How I remove finish with a stripper: I pour some stripper into a metal container. Then with a brush I apply it onto the surfaces. Once the stripper have dissolved the finish (made it softer, and liquidy) it is time to scrape the stripper-finish goo. I like to use coarse saw-dust as a medium for scrubbing and absorbing the stripper-finish goo. To collect the goo form beaded details and other intricate areas you can use ropes, shop made wooden scrapers, etc. Then after all the goo have been taken off, you can clean any remaining stripper residues with a cotton rag moisten with mineral spirit or water – read the instructions carefully to learn what is the recommended material to rinse & naturalize the stripper. Next time I will talk about the restoration/alternation process
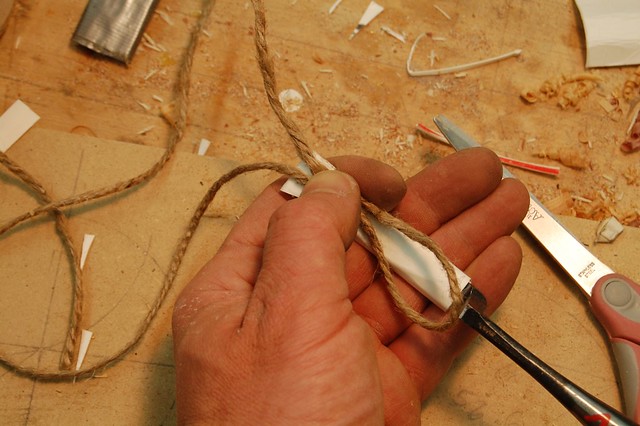
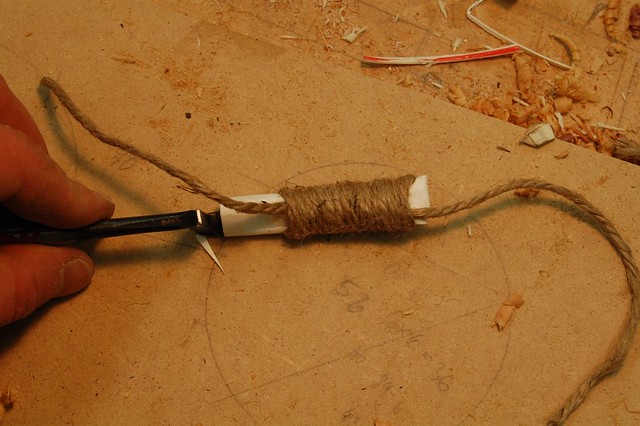
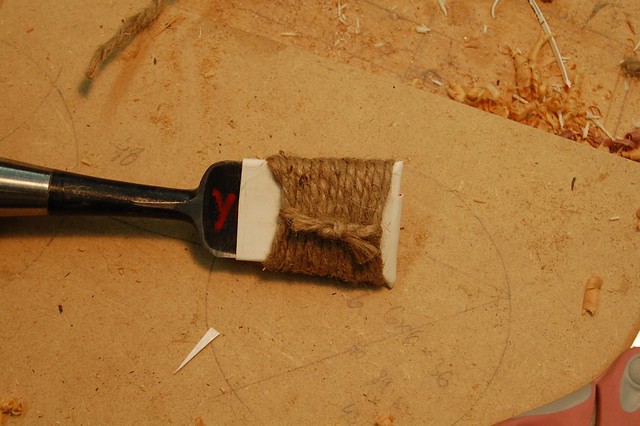
We woodworkers have plenty of sharp tools in our possession. From chisels to gouges, from marking knifes and awls to compasses and drill bits. The question of how to protect the sharp edges from damage, and how to protect ourselves from being hurt by them, is always in the air. Not always will you get a chisel guard with the tool and, in the case of specialty tools, you will probably receive none. So, last month I came up with an idea to make a cheap and nice looking guard which can be tailored to protect and (keep at bay) almost any tool tip. The ingredients I used can be found in every household: a milk carton and rope. Milk cartons is tough and are supposed to be non-acidic, so it will not hurt the steel on your tools. Basic recipes: I cut a piece of cardboard form an empty food container, such as a milk or soy-milk container. Half of it extends beyond the tip of the tool and half under it.
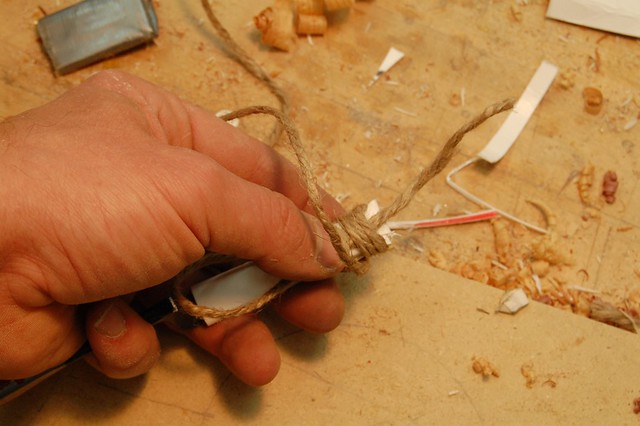
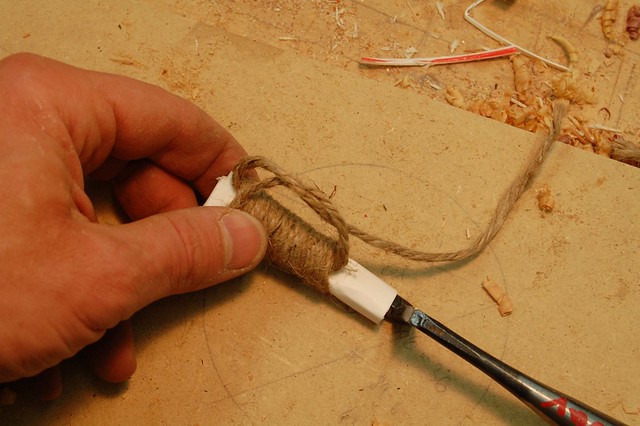
I fold it a few times around the tip of the tool, then fold the extended half backwards and wrap a rope whipping around it....To learn few techniques for rope endings (whipping) see the attached video (Youtube).
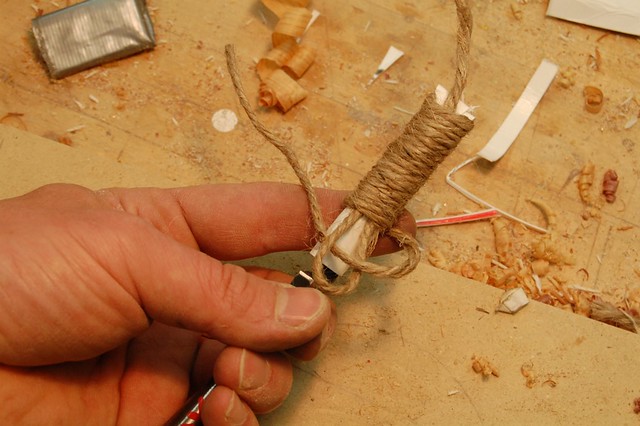
At this point you can decide to leave the whipping as is or to add another decorative knot to it...
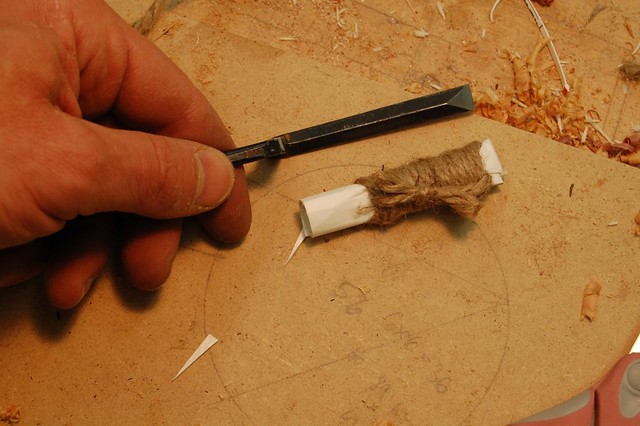
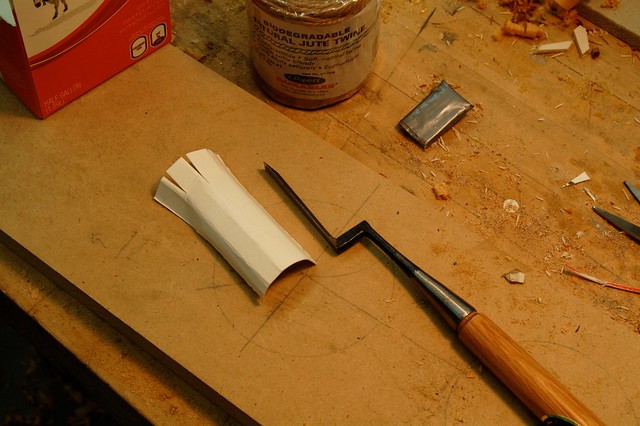
Fancier technique: I cut a series of flaps at the end of the cardboard and gradually fold/tuck them in as the folding around of the cardboard progresses. I than use the rope ending technique as described before..
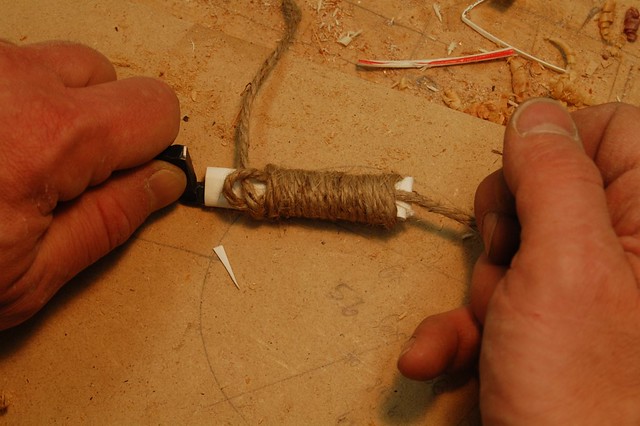
As you all found out securing chisel or other tool guards with duct tape is a short term measure; duct tape will eventually peel of and will leave a sticky gooey residues all over the place. My technique (I am sure I am not the first one who thought about it) is clean and neat.
The third assignment I gave to my students at Purchase, was to design and make a lamp. We had great success here with lamps ranging from artistic and beautiful to enigmatic, humoristic and topsy-turvy. I intend to show you the lamps in a future posting and, by the way, all are made primarily or partially from wood. One of my students, Robert Snyder, made two lamps. One of them was a clever Halloween prank.... but we are not cutting any slack (or corners) here: he used the best wood-joinery possible.... believe me.
And as you can see here, the dovetail construction is very meticulous.
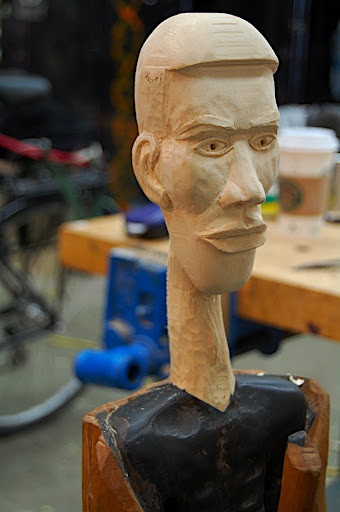
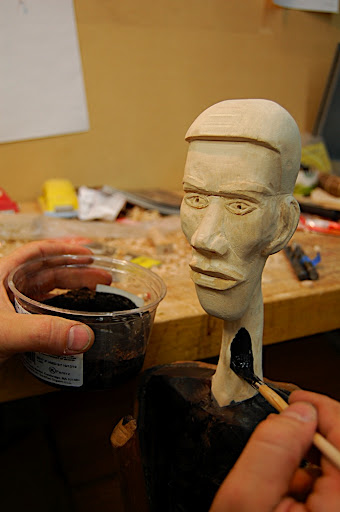
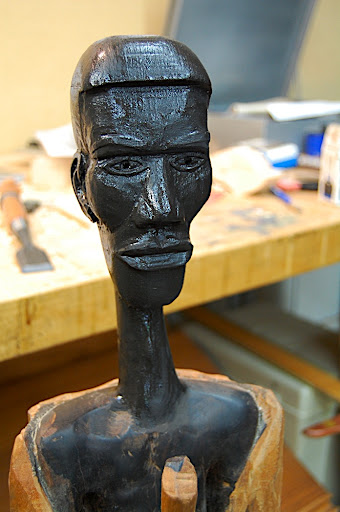
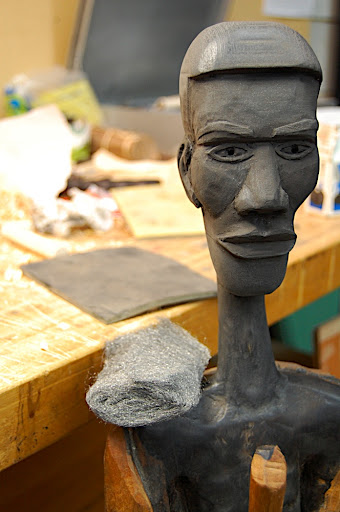
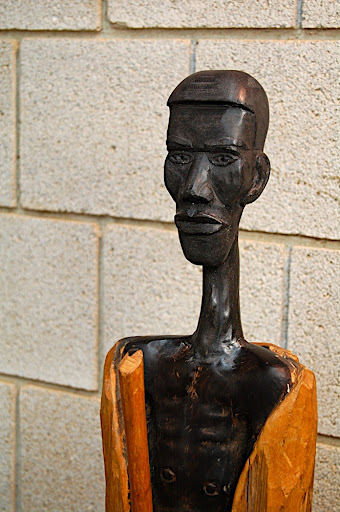
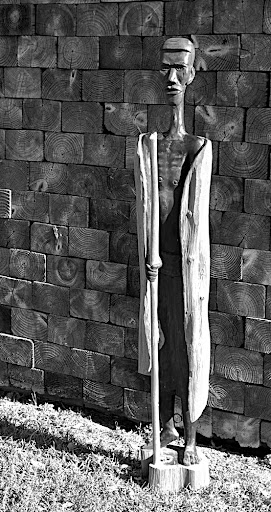
Milk paint is my favorite opaque finish for wood. I buy my milk paint powder form the 'Old fashion milk paint' company. I then mix it myself to the consistency I like; the more water you add the more diluted and "washy" it will be. With a thick layer of milk paint you can completely mask over the grain and the character of your workpiece. Diluting the solution will allow you to see through the paint and notice the grain, etc,. I will talk about milk paint in more details in the future. To blend the basswood with what appeared to be ebony (the original African worrier sculpture) I mixed black milk paint with brown and 'drift wood' color. I painted the head and neck, then waited to it to dry. I put on a second coat and after it completely dried I buffed the surface with steel wool. Lastly applied a coat of Wax.
|
AuthorI will share with you my own work, tools, and techniques. I will show how my friends and students build beautiful objects. Sometimes I will talk about wood, forests, sustainability and much more. I am sure it will be interesting Archives
January 2011
Categories
All
|


 RSS Feed
