Yoav Liberman Design
  • Studio Furniture
    • Black Cotton
    • Torah ark
    • Mulberry trio
    • Ascent
    • Attn: John Everdell
    • Merritt
    • Corduroy
    • Brownstone
    • Shahnameh
    • Cantabrigian Highboy
    • Six Pack
    • Jacob's ladder
    • Crotch table
    • Scott Wiseman's table
    • Shah
  • Sculptured Pieces
    • P:91
    • A House Divided
    • American Beauty
    • Bust
    • Lobster pod
    • Artifact
  • Decorative Art
    • Woods of NYC
    • Etrog Box, Prismatic 2018
    • Etrog Box 2013
    • Etrog Box 2003
    • Etrog Box 2004
    • Etrog Box 2005
    • Flash Teapot
    • State of the Union
    • Saucer
    • Block
    • Etrog Container
    • Cutting and Display Boards
  • Design & Innovations
    • Magnetic Straightedge
    • Screwdriver Coin
    • Mortise Chisel Handle
  • How I create
    • Slide show
    • Video
  • Teaching
  • About Me
    • Contact
    • Exhibitions and Galleries
    • Press
    • Favorite links
  • Blogs

Lie Nielsen's Open House and the making of a table top – part 5: Edge joining completed 

9/14/2010

0 Comments


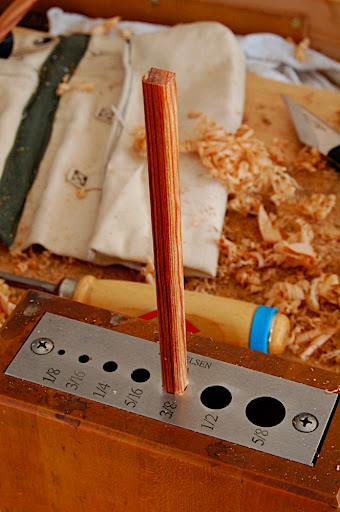
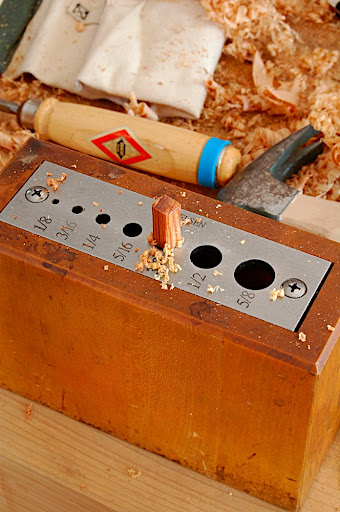
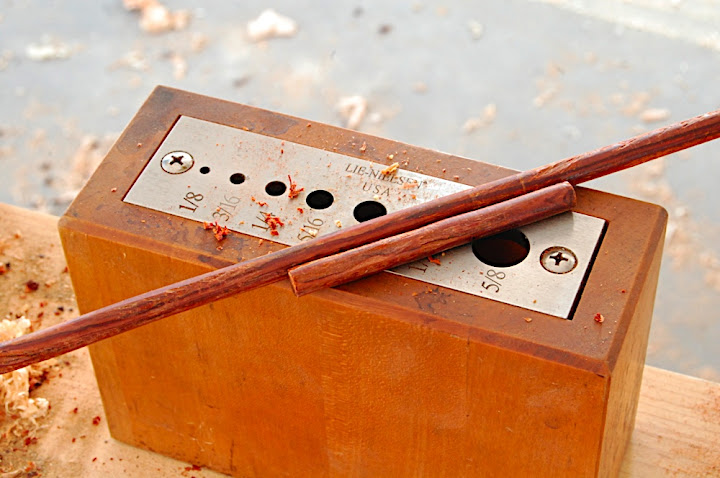
After making the keys and forming all the the mortises, I made the dowels.

To make a dowel I first used the band saw to re-saw and form a square shape rod. Then I forced it into a hole in a dowel maker (dowel maker in a steel plate that has tapered holes in deferent dowel diameter.


I found out that some woods, like Bubinga or Heard pine, will not shave so nicely while others, such as birch or maple will be easier to form. However, I choose Bubinga for its beauty and contrasting effect on the oak.


I glued half of each key into its dedicated mortise.


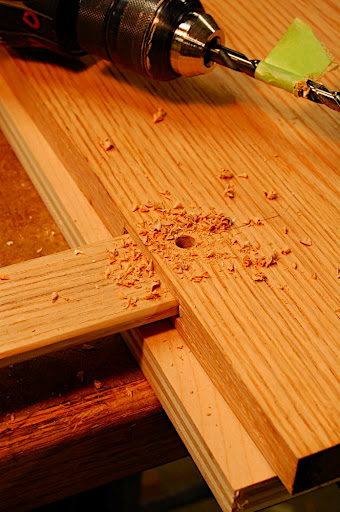
After the glue dried I drilled a hole that passed from one face of the board to the other, penetrating through the key. Than I inserted the dowel to secure the key – just in case, and for appearance purposes.

Then came the crucial part of drilling and alighting the holes on the other side of the board, so that once the dowels are inserted the it will force the joint between the boards to close; enough to make the dowel to spring and pull the key inside the mortise and consequently the edges tighter.
I started by drilling the boards (to prevent fibers from the inside of the mortise walls form blowing out, I inserted a sacrificial floating tenon while drilling).


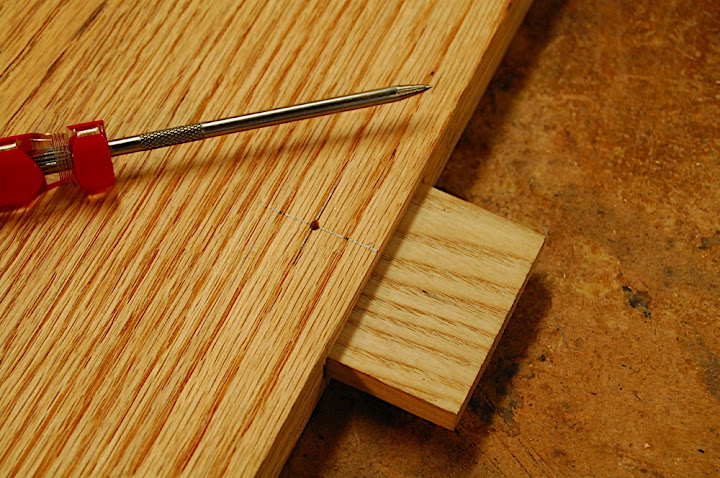
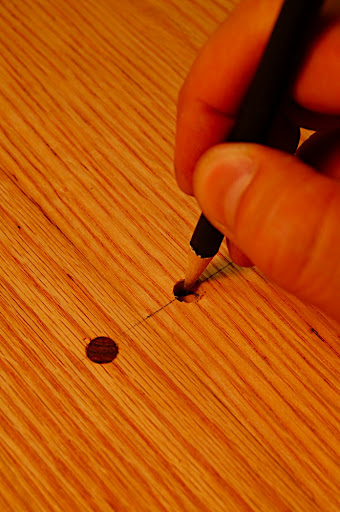
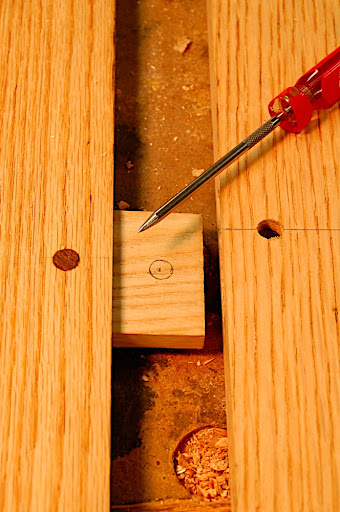
Than I inserted the facing boards and its keys to the mortises and marked out the circumference of the entry hole onto the key.


The next step was to indent an of-center point on the marked out circle. I drilled the of-center hole, brushed glue in the mortises, on the keys and on the edges and pressed the parts together. Then I drove the dowels in (with some glue) and saw how they pul the joint tight.


0 Comments


Leave a Reply.

    Author

    I will share with you my own work, tools, and  techniques. I will show how my friends and students build beautiful objects. Sometimes I will talk about wood, forests, sustainability and much more. I am sure it will be interesting

    Archives

    January 2011
    December 2010
    November 2010
    October 2010
    September 2010
    August 2010
    July 2010

    Categories

    All
    Campaign Furniture
    Design
    Fellow Artists
    Furniture Resoration
    Metalworking
    My Work
    Reclaimed Wood
    Sculptured And Carved Work
    Sharpening
    Students Work
    Teaching
    Tools

    RSS Feed

Powered by Create your own unique website with customizable templates.